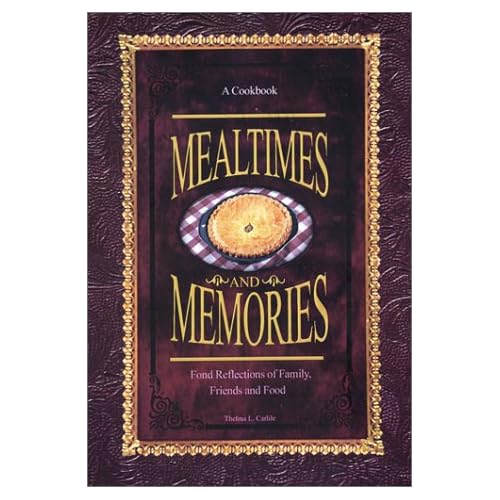
 When Kendra and I got married we had several showers, none of which were driven by greed, from friends and family who wanted to host a shower in honor of our upcoming nuptials. We had a shower in my hometown, at the church where I was currently working, and then one in West Texas where Kendra grew up. It was the shower in West Texas the yielded probably the single most precious gift, a cookbook. Though the cookbook pictured here is not the way my cookbook is bound, it most certainly THE cookbook. I've read this cookbook no less that 100 times over the past 12 years. What makes this cookbook so special is in the stories that the author writes about each recipe. If I ever met Thelma I'd know all about her life because this cookbook has served as an autobiography of sorts. I can't really begins to count how many recipes I have cooked out of here, hundreds to say the least. Amazon has this cookbook listed, out of print as of now, I'd highly recommend this cookbook to the beginner cook--well any cook for that matter.
As with any recipe I can't just make it like it is, I have to change it because I think my way would be better. I'll add more of this or that, change up some of this or that and tweak it here and there until I get the right about of what I'm looking for. This is true with Sloppy Joes. My entire life I have eaten sloppy joes that were made by frying ground beef and dumping a can of "mix" into the skillet and calling it a day. Since it was all I knew I loved it...then one day I made the recipe for Sloppy Joes out of this cookbook and have never picked up the can of mix since. If your family loves Sloppy Joes then give this a try, even if they don't try it you might be surprised. This is a perfect recipe for a beginning cook because the success is guaranteed and the confidence of this cook will be increased tenfold.
The cast of characters is missing because I realized I didn't have one of the ingredients, crucial to the recipe, so I had to run up to the store to get it. So, with your apologies I'll press on with quite a few photos. My wife was helping me cook and had agreed to take over the babysitting of the cooking while I went to the store and she said, "why are you taking pictures of this?" "For the blog, it's my next post." "OHHH kay...it's a good thing I love you." By this time in our marriage my sweet wife is just used to me, nuff said.
Sloppy Joes

2 lb. Lean Ground Beef
1 cup Onion, diced
1/2 cup Celery, diced
1/4 cup Brown Sugar
1 Tablespoon Cavendar's Greek Seasoning
1 Tablespoon Cracked Pepper
1 teaspoon Salt
1 can condensed Tomato Soup
3/4 cup ketchup
3 Tablespoons Prepared Mustard
1 cup water

I usually dice one onion, the size of a baseball, and call it good. I like to keep the dice small just because the flavor is what I'm shooting for not the texture of a hunk of onion. The same is true with celery. Don't get a measuring cup dirty for the celery, you will need 3-4 ribs of celery. Did you know that each piece of celery you break off is called a rib? That's free--not charge. Get your skilled (at least a 3 quart) hot and add about 1 tablespoon of olive oil to it and let it get hot. Add the celery and onion to the skillet and let it cook for about three to five minutes to sweat out the onions. You want the onions to turn from white to clear.
Add
 your ground beef to the skillet and begin to break that up. I use a potato masher to get my ground beef nicely broken. It's kind of a pet peeve. This step was taken care of by my sweet wife while I was at the store, and she used a masher because she knew I would and that is why I love her xoxo honey!. You'll cook the ground beef for about 3-5 minutes or until most of the beef is no longer pink. Season the mixture with the salt, pepper, and cavendar's. Add your brown sugar (this picture shows the two tablespoons, but add all of the amount listed in the recipe above) and stir to combine. Next Add the ketchup, mustard, tomato soup, and water. Stir carefully so the whole mixture gets incorporated.
One of the most important pieces of advice I can give to a beginning cook is to never cook on high heat. I rarely ever get my stove above medium to medium high. This will help you control the temperature and not lead to those disasters you get in the kitchen with the higher heat.
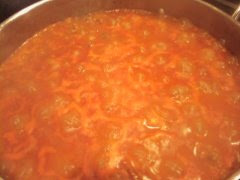
This will seem very dull and dim, and very runny but don't loose heart because it needs to reduce for about 10 minutes. Let the mixture come to a simmer and stir every two or three minutes, it will begin to develop the thickness that Sloppy Joes are known for. Also, don't taste at this point you'll be disappointed and want to dump the spice cabinet into it. Taste right before serving because the reduction intensifies the flavors and really helps this come into it's own. I've included several photos of the process that this sloppy joe went through to become it's wonderful self.

This is a blurry close up of the mixture after 10 minutes. Remember I use a camera phone, so don't be hatin my photography. This thickens up remarkably well and the flavor blows the can out of the water.
I serve this on buttered toasted buns with a slice of processed cheese. Kendra made some great sweet potato fries (recipe later) and we loved it. Levi was unsure of this but I know he'll be a lover not a hater once his three-year old pickiness passes. It's fast, inexpensive, easy and really delicious. This will make enough meat for 10-12 buns. I would say I give a good 1/2 cup of the mixture, maybe less.
I use a silicone spatula that is shaped like a spoon. Some call it a spoonula but I think that sounds just ridiculous and refuse to say it or use it. These are great because I can cook the entire dish start to finish and serve with it. This took is really a great addition to your kitchen. I grab this more than any other spatula I have, as a matter of fact I have three of these in varying colors (I think red, white, and blue). The only thing that could make this better would be if this were a solid piece of coated steel. I have a couple of those and love, love, love them. I use this tool for spaghetti sauce, mac-n-cheese, when I make muffins this is great for filling the cups. If you don't have one, the very next time you are around the kitchen gadget wall, look for them and pick one up. Oh and they are heat safe to 450 degrees--how cool is that.
Love the Sloppy Joes, do try the cheese on there.
I use a silicone spatula that is shaped like a spoon. Some call it a spoonula but I think that sounds just ridiculous and refuse to say it or use it. These are great because I can cook the entire dish start to finish and serve with it.
 This took is really a great addition to your kitchen. I grab this more than any other spatula I have, as a matter of fact I have three of these in varying colors (I think red, white, and blue). The only thing that could make this better would be if this were a solid piece of coated steel. I have a couple of those and love, love, love them. I use this tool for spaghetti sauce, mac-n-cheese, when I make muffins this is great for filling the cups. If you don't have one, the very next time you are around the kitchen gadget wall, look for them and pick one up. Oh and they are heat safe to 450 degrees--how cool is that.
Love the Sloppy Joes, do try the cheese on there.


