Sunday, November 7, 2010

Potato Soup


My Mom went to work when I was one year old at St. John's hospital in Joplin.  She worked there for nearly 40 years, forced into retirement last year.  I grew up not knowing what a say at home Mom was like, I only knew what a working Mom was like, but when that is all you know it's normal.  I spent a ton of time with my Great Grandmother and my Great Aunt (whom I called Robba) and credit them with instilling my love for cooking.  It was in their kitchens that I learned the ropes of basic country cooking.  I could fry a mean pork chop by the time I was 10.  I can remember spending hours in front of the TV watching public access cooking shows and learning a great deal about food from those cooks.  I just seemed natural to me, to love cooking and reading cook books.

Most kids have quite a list of things they love for their Mom's to cook.  I cant' really say that I have a list because I can't remember my Mom ever making cookies or cakes, or anything "special" that I just have to have. I do remember my Mom making my Grandpa a yellow cake with fluffy white frosting and coconut, which he really liked a lot.  My Mom did make Potato Soup, always served with a side of cornbread, when the weather started turning brisk.  I think it's the one and only thing my Mom actually made.  Some people used to say that they felt sorry for me, but I don't think pity or sorrow is necessary.  It was all I knew so it was normal, I never pined away wishing for something better because I thought I had a pretty great Mom.  My Mom took me to work with her from the time I was 7 until I left for school.  I could fill a library with the things I learned from spending time with my Mom at work.  The work ethic and drive I have today is a direct result of those days spent at her side watching her work until she couldn't wiggle one more eyelash and working some more.

I have a recipe for a loaded potato soup that I really love, but this recipe is straight from my Mom's kitchen and transports me back to my childhood.  As long as I make this soup I will be able to connect to my Mom.  I'm blessed to still have my Mom here with me and we love spending time together.  My kids are amassing a list of the things they love, and I hope that when they are gone the first thing they say when they come home is, "can you make..."  The greatest treasure for my children is the time they get to spend with my Mom, their Nonny. We take Nonny on vacation with us, go to her house for the weekend just to hang out, and spend all of our holidays with her, too.  That time is irreplaceable and something I know they will cherish all of their life.

Ok, we've pulled off of Memory Lane and are now ready to talk soup.  This soup is straight forward and honest comfort food.   It couldn't be more simple to make, but has a great flavor.  After Kendra and I were married I discovered the wonder of adding cheese and bacon to this soup, something I had never added as a kid.

2 russet potatoes per person, plus one for the pot
1/2-1 cup butter (depending on how much soup you make)
1/4-1 cup milk or half and half (we always used milk)
Salt & Pepper to taste
Crisp bacon, cheddar cheese, green onion for garnish

Peel the potatoes and cube them up, trying to cut the potatoes in fairly uniform size.  Add the potatoes to a large stock pot and add cold water just enough to cover them.  Cover the pot with a lid and bring to a boil over medium heat.  Once the potatoes start to boil, add about 2 tablespoons of salt and boil until the potatoes are fork tender (about 8-10 minutes).

Drain the potatoes, saving about 1/4 cup water.  Add the butter and stir until melted.  The potatoes will break up as you stir.  Add milk and stir.  Season with salt and pepper, taste and adjust seasoning to your preference.  I usually get out the potato masher and mash up the potatoes a little bit.  I really depends on how chunky you like your soup.  Sometimes I will make it smooth, no lumps, other times I have just a few chunks of potato.  Bring this back up to a boil.  The starch from the potatoes will thicken the soup.  If it gets too thick add just a touch more milk to thin it out.

Serve this with cornbread and your choice of garnish: bacon bits, cheddar cheese, green onion.  Mom always crumbled up her cornbread in the soup.

Tuesday, November 2, 2010

Red Velvet Cake

I can almost remember the date and time of the first time I ate a bite of Red Velvet cake.  Kendra and I were working at a new church plant in a tiny community outside of Edmond, OK and had reconnected with some very good friends of ours who were also attending the same church.  Red Velvet was our friend, Donna, and her family's favorite celebration cake.  Donna shared with me that her mother had made this cake for her and that no one could make it like her mother.  Who could make something like a mother? No one!  We come close but the one ingredient that cannot be recreated is the pinch of mother's love that goes into the creation of a dish.  Red Velvet was a way to honor, remember, and enjoy a fond child hood memory.  Luke, her oldest, requested it more often than not (I remember one strawberry cake he requested) as his birthday celebration cake.  That first bite was just incredible.  I knew at that moment, Red Velvet would be a life long favorite cake.  Now over a decade since that first bite it is, in fact, still a lifelong favorite.

I was determined to make this cake for several reasons.  The foremost reason was I wanted to make the cake for Donna so she wouldn't have to make her own birthday cake.  The first several cakes were made in her kitchen, with her close supervision.  Kendra and I always had a great time with Brian, Donna's husband, and Donna.  I always came, "close enough" she would say.  I think she was just glad she didn't have to make her own cake!  Red Velvet remains one of the only truly from scratch cakes I make.  I make this cake at Christmas and for Kendra on her birthday because it is her hands down favorite cake.  My children have fallen in love with Red Velvet and is requested quite often.  I save it as a celebration cake to keep it special.  Mentioning the words red and velvet send my kids running to kitchen to enjoy a slice or two.

This is an easy cake to create, however you must remember to follow certain steps to ensure that it turns out right.  It has a subtle chocolate note, isn't a chocolate cake.  The flavor can only be described as red velvet as their is no other taste with which to compare.  You MUST not over bake this cake or it will be dry.  I usually take my cakes out before the minimum baking time elapses finding that 22-25 minutes is all it takes to make this cake "done."  I think, possibly, the single biggest mistake a cake baker can make is to over bake a cake as this leads to dry cakes.

I promise I'm almost ready to give you the recipe.  There is just one more issue that we have to cover: frosting.  Putting a cream cheese frosting on a red velvet cake is without a doubt very popular, however I submit that it is a criminal offense.  Red Velvet cake is subtle, cream cheese frosting is obnoxious.  Who wants an obnoxious flavor hog icing on a subtle delicate cake like red velvet? Not me.  The frosting I must insist you make is the one included.  Please do not let me know you've made this cake and frosted it with cream cheese frosting.  There are just somethings people need to never be told.  This frosting is as subtle as the red velvet itself, yet when the two come together they are magic.  The frosting is creamy, light, and has just the hint of vanilla flavor. The creamy texture of this frosting gives your palate that "velvet" taste.  Having a stand mixer will keep us friends, if you decide to make this frosting.  You have to mix the sugar and margarine together for a very, very long time.  We'll get to that though.

Red Velvet Cake


  • 1/2 cup shortening
  • 1 1/2 cups sugar
  • 2 eggs
  • 2 ounces red food coloring
  • 2 tablespoons cocoa (heaping)
  • 1 cup buttermilk
  • 2 1/4 cups flour
  • 1 teaspoon salt
  • 1 teaspoon vanilla
  • 1 teaspoon baking soda
  • 1 teaspoon vinegar


Step one:
Pre-heat oven to 350 degrees.
Grease and flour two 9" cake pans, set aside.
In a small bowl: add the food coloring and cocoa together, mixing well.  Set aside for step three.
In the bowl of a stand mixer add the sugar and shortening together.  Mix on medium speed until completely incorporated (about five minutes), scraping down the sides to ensure even mixing.  Add eggs one at a time, mixing completely between each addition. Add salt and mix.

Step two:
Add flour and buttermilk, alternating between the two.  Remember you always begin and end with the dry.

Step three:
Add the food coloring and cocoa paste. Mix to incorporate.  Add vanilla.  Add the soda and vinegar, in a small bowl and add to cake batter.  Mix just to incorporate.

Dispense the batter evenly and bake in the pre-heated oven for 26-30 minutes.  Check the cakes often with a cake tester after 20 minutes and remove promptly when cake tester comes out dry.  Cool on wire racks until ready to frost.

Frosting.


  • 3 tablespoons flour
  • 1 cup milk
  • 1 cup sugar
  • 1 teaspoon vanilla
  • 1 cup margarine (Parkay all the way), room temperature.

Step one:
In a medium sauce pan, add the flour, milk, and vanilla.  Over medium heat, stir with a wire whisk until the mixture comes to a boil.  Remove from heat.  Place in a shallow dish and cover with plastic wrap.  Cool in refrigerator until no longer warm (10-20 minutes).

Step two:
In the bowl of a stand mixer, fitted with the whisk attachment, add the butter and sugar.  Mix on medium speed until the butter and sugar combine then on high until the mixture is fluffy and creamy (about 20 minutes).  Add the cooled paste and mix until is is well blended.

Frost cooled cake.

Notes:
  • I don't cut corners when it comes to greasing and flouring pans on this one.  I had rub Crisco in my pans and then flour them to ensure there will be no sticking.
  • As soon as I put the cakes in the oven, I make the paste and get it in the fridge to cool.  By the time I get the mess cleaned up from the cake batter... the cakes are done so I pull the cakes out of the oven to cool.  That's about the time to start the frosting, and by the time the frosting is mixed enough to add the paste it's cool (about 40 minutes has elapsed.).
  • The butter and sugar will look fluffy, but be sure to feel it because you don't want to feel a lot of grains.
  • I usually put this cake in the fridge and let it set up overnight.  I don't know why, but I do.
  • I think the next time I make this I'm going to dump in the cocoa, mix it, then add the food coloring to the mix and try to avoid the stirring process all together.  It may not work, but it's worth a shot.  My kitchen usually looks like a red paint grenade went off.
  • These cakes don't rise a lot, they will look flat so don't freak out.  It's ok, it's normal.

Monday, October 18, 2010

Barbecue Beef Empanada

Fall is trying ever so hard to be a real presence, I'm really wishing it luck!  One of my family's favorite Fall dishes is Potato Soup.  I don't really have a recipe for potato soup, I just make it like my Mom always has.  If you haven't ever made potato soup and want a good recipe start here, it sounds so good.  My potato soup is very straightforward, potatoes, butter, milk, salt, pepper, and cheese.  We love it especially my Son, Levi who asks for it quite often.  The usual tag along with potato soup is cornbread, but this weekend I wanted to make something a little different and add a little more umph to the meal.  What I came up with was this barbecue beef empanada, which is so easy and really, really good.

An empanada is nothing more than a "stuffed" sandwich.  After I made these, I had a ton of other ideas on how to twist the filling and also change up the bread used, so I'll be playing around with this recipe for a while to see what all I can come up with . After the recipe I'll post some of my ideas on fillings and bread combinations.  This recipe came together right at 30 minutes, which included thawing meat in the microwave.  I did bake the crescent rolls a little longer than called for, in my oven I went a full 15 minutes, because I wanted to make sure the bottom crust wasn't soggy.  The extra baking time was the ticket.  After assembling the pastries, I put about 2 tablespoons (a good pinch) of Colby jack cheese on the tops of each empanada.  I love that crusty cheesy taste it gave.

Barbecue Beef Empanada

1 pound ground beef
1 teaspoon Lawry's Seasoned Salt
1 teaspoon cracked pepper
1 cup Barbecue Sauce (my family likes K.C. Masterpiece)
1 1/2 cups Colby Jack Cheese
2 cans Crescent Rolls

Preheat oven to 375 degrees.  In a medium skillet brown ground beef, adding seasoning salt and black pepper.  Remove from heat.  We use 90% lean so we don't have any fat to drain, but drain if there is any liquid in the pan.  Add the barbecue sauce and cheese, stirring until the cheese completely melts.  Set aside.  Line a cookie sheet with parchment.  Let me interrupt this post by saying, "PLEASE start using parchment paper, you'll thank me one day, you really will." Open the crescent rolls and unroll.  Press two triangles together to make one large rectangle.  Place about 2 tablespoons of the filling in the center of the crescents, fold over and seal the edges, you can just press them down with your fingers.  Repeat until you have assembled all the crescents (8 in all).  Place a pinch of cheese on top of each empanada.  Bake for 15 minutes at 375, until golden brown.

Ideas:

  • Cordon Bleu: Diced chicken and ham, mixed with Mozzarella and Swiss cheese, add some Dijon Mustard.
  • Pizza: Pepperoni, ground beef, and pizza/spaghetti sauce, with mozzarella cheese.
  • Fajitas: Chicken or beef, with peppers and onions, add salsa and cheese.
  • Add your families favorite veggies to any of the above.
  • White Tuxedo: Diced chicken, crumbled bacon, sauteed mushrooms, peas, Alfredo sauce and cheese.
  • Use Pie crust (use a fork to seal the edges) for any or all the above fillings.
  • Reuben (I really can't stand Reuben but some people really, really love them)
  • Breakfast: Use biscuits if you want adding sausage, bacon, ham, veggies with scrambled eggs.
Have fun with this recipe and use your imagination to come up with your very own.

Friday, October 8, 2010

Banana Bars

I had to have one bite!


 There are certain smells that transport me right back to my childhood.  The smell of Old Spice will always remind me of my Dad, who wore that scent until I went to college.  Food has a way of taking me back in time and kindling fond memories, too. These memories are sharp as the time I was making them because they are of friends and family who I don't  have the pleasure of being around all the time.  I can prepare a dish and immediately be back with that person and, through their recipe enjoy some fond memories.  These banana bars have that nostalgic connection for me.
When I worked in Fort Worth, TX as Children's Minister our church building was sold and we began a two year process of building a new building North of the current location.  This two-year time span was certainly challenging, but also among some of the best times of ministry, personally.  We met in the Keller ISD High School and each week transformed the school into our church building.  Teacher's lounge became the Nursery, Cafeteria and halls became classes for preschool through 5th grade, and the performing arts center (auditorium) was one where the adults Bible class met.  It was during this time that many, many new faces came our way, among them the Cardenas family.  Adam, Gabe, Mari-Kathrine, Dillon, Sharon, and Renan would come rolling in every week.  Usually whisking Dillon off to the Nursery, in a rush, always smiling and enjoying being part of the excitement that was our church experience.

Sharon eventually became my secretary and very good friend.  We became fast friends because we shared a love for cooking and eating.  We talked a lot about food and cooking and would find a recipe online and tear it apart to make it our own.  Ms. Sharon has some great recipes, and these banana bars are at the top of that list.  They cake is super moist, thanks to the addition of sour cream, and has a subtle yet unforgettable banana flavor. Light and tender, with the hint of vanilla and almond (I added almond extract to the recipe) throughout.  You top these wonderful bars with a cream cheese butter cream that I could eat with a spoon.  The cake doesn't last long, but keeps very well, covered on the counter.

If you have some bananas past their prime, give these bars a try.  A simple powdered sugar glaze would also be wonderful on this bar, if you didn't have or want to make cream cheese butter cream.

Cake:

Here's the batter spread into the pan ready for the oven.
1/2 cup room temperature butter
1 1/2 cups sugar
2 eggs
1 cup Sour Cream
2 bananas, peeled and cubed
1 teaspoon vanilla
1/8th teaspoon almond extract (cap full)
2 cups flour
1 teaspoon baking powder
1 teaspoon salt

Preheat oven to 350.  Grease and flour a half sheet pan, set aside.  In the bowl of a stand mixer: add the butter and sugar mixing well (5 minutes) on medium high heat.  Add the remaining ingredients, mixing each well before adding the next.  When completely incorporated, spread the batter evenly onto the baking sheet and bake for 20-25 minutes or until set.  Cool completely before frosting with butter cream.

Notes:  I don't mash the bananas because my mixer does a good job of that, it saves a step and a bowl.  I think these would make great cupcakes, you would have to play with the cooking time of course.  If you don't have a half sheet (I get mine at Sam's) baking sheet, you can use a jelly roll pan just fine.

Here it is hot out of the oven.  The white spots are the banana
bits, so good.
Cream Cheese Butter Cream

1 stick room temperature butter
8 oz Cream Cheese
1 Tablespoon Vanilla
1/8 teaspoon almond
2 boxes of confection sugar.

Beat butter and cream cheese together until smooth and without lumps.  Add extracts and mix to incorporate. Slowly add confection sugar and beat until smooth and creamy.  Frost cake.  If the frosting is too thick add some milk to thin the frosting.

This cake is super simple to whip us and is so delicious, especially when the cake is still just a tad bit warm and the icing is kind of...melty.  You can keep this in the fridge or on the counter, either place is just fine.  If you really didn't feel like making frosting (it's super simple to do, you really can do it) you could crack open a can.  I can't remember the last time I ate canned frosting, it is just so simple to make your own.  I think you will want to keep this cake in your handy file and use it often.  Ms. Sharon also has another great sheet cake called a White Texas Sheet Cake that we tweaked over and over to make it right.  Just typing those words has really made me want to make that cake now...great.

Wednesday, September 29, 2010

Root Beer Float Cupcake

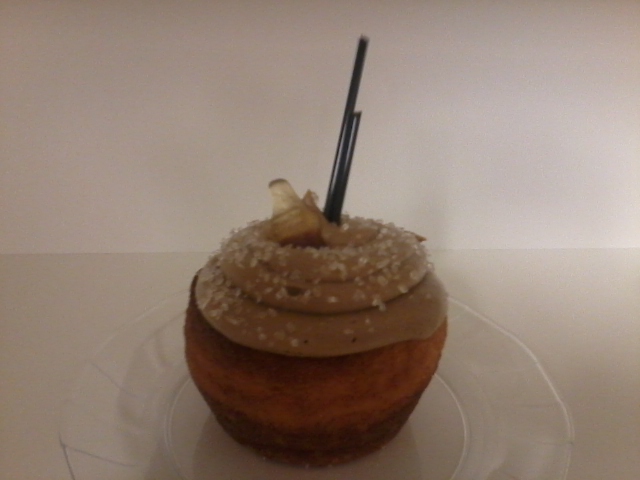
The Youth Group at my church hosted a Mother/Daughter 50's night in our Coffee Shop and asked me to cater the event. I stayed with the 50's food theme and decided to create a Root Beer Float cupcake.  Cupcakes seem to be EVERYWHERE these days, so I figured I'd be all trendy and current since that's how I roll for once.  I figured I wasn't the first person in the world to come up with the idea and after a quick Google search discovered I was about the millionth person.  Almost every single recipe I read (close to 30) involved using root beer in the cake batter and going with a vanilla butter cream frosting.  That just wasn't for me, so I went in another direction and came up with this recipe.
I used the Wilton Muffin pan to make the "jumbo" size cupcake.  These tins were about 1/3" deeper than other jumbo pans in the baking pan aisle.  I found these at my local Super Center in the cake decorating section.  Since they were bigger than usual, it used more batter.  I think I was able to get around 22 cupcakes from one box.  I did not line the tins, opting to use Baker's Joy with great results. 

About 8 years ago I saw at trick on TV for kicking up cake mixes and have been doing this trick ever since and have not been disappointed.  I use a Super Moist cake mix, add an extra egg, vanilla, and use milk instead of water.  Of course you don't have to make this in a muffin tin, and could use 9x13 or cake rounds, I just like the idea of cupcakes.

The frosting was my favorite cream cheese butter cream into which I added root beer concentrate.  I've always seen Root Beer concentrate by the extracts in the baking aisle and pondered who in the world would use that and for what?  Now. I. Know.  I had never used this concentrate and was a little afraid of the word "concentrate" so I went the, "it's easier to add to than take away" rule for cooking.  What I discovered was that it took a considerable amount more than I thought to achieve the root beer flavor.  I would guess it was triple what my expectations were, so much for being afraid of a word.

I piped the frosting on using a pastry bag with no tip, because I wanted the wide stream of frosting that, again is super popular in the baking world.  I was going to add a bendy straw, but decided that coffee stir sticks would look more elegant.  I couldn't find root beer barrel hard candy to save my life, that was my first choice in garnishing this cup cake, so I went with cola jellies instead. 

All in all I think the end result was visually appealing and, if I do say so myself, tasted really good.  It truly tasted like a root beer float.

White Cake:

1 box White Moist Deluxe Cake Mix (Duncan Hines is my favorite)
1 1/4 cups Milk
4 eggs
1 Tablespoon Vanilla
2 Tablespoons Canola Oil (or vegetable)

In a stand mixer, add the cake mix and remaining ingredients.  Mix on low speed until combined, then on high for two minutes.  Bake according to package directions for the pan you are using.

Root Beer Butter Cream:

1 stick Butter (room temp)
8 oz Cream Cheese (room temp)
1 Tablespoon Root Beer Concentrate
1 Tablespoon Vanilla
2 lbs. Confection Sugar

In a stand mixer add first two ingredients and Cream the butter and cream cheese together until smooth, adding both extracts, blending together completely.  Slowly add the confectioners sugar, blending to incorporate until desired consistency is achieved.  Pipe or frost onto cooled cupcakes.

Note: Taste your frosting and keep adding concentrate until you reach the flavor level you want.  Like I said, earlier, I used more than I thought I would.

Oh, one more thing.  I took the picture of the cupcake with my camera phone, in an empty cabinet.  Not too shappy, huh?


Saturday, September 11, 2010

Lemon Pie


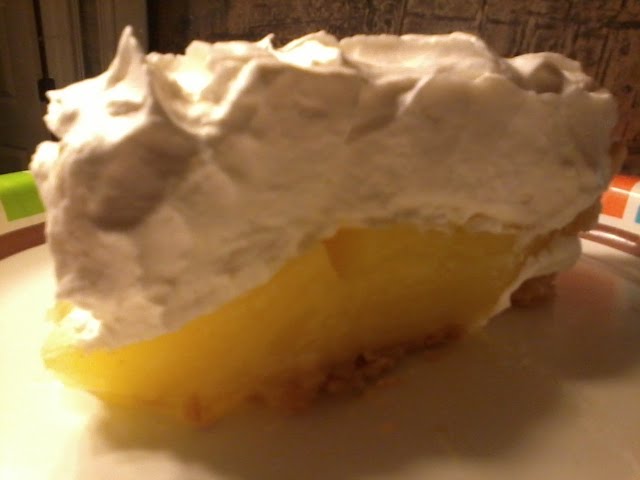
 My Mom got a craving for lemon pie over Labor Day and asked if I could make her one.  Of course I told her I would be happy to make her a lemon pie, the whole time my brain was scrambling to figure out how in the world I was going to make a lemon pie.  I had never made nor seen anyone make a lemon pie filling before.  I spent about three hours researching the internet and my Mom's cookbook collection and came up with a recipe, the combination of many, which we all liked very much.  I didn't use fresh lemon juice or add lemon zest, however I think that would up the lemon flavor considerably.  That's my next tweek, fresh lemon juice and lemon zest.

   This lemon pie is the perfect combination of tart and sweet.  I opt for whipped cream topping instead of meringe, however you could easily make a meringue.  I'll give you the recipe for whipped cream and meringe topping.  Before we go any further, I have to say this is the easiest pie in the world to make.  If you can stir you can make this pie.  Take some time to get your ingredients set up and this will come together lickity split. 

Let's get started

Pre-baked 9" Pie crust
4 egg yolks (save the egg whites if you are making the meringue)
1/3 cup corn starch plush 1 tablespoon
1 1/2 cups water
1 1/2 cups sugar
1/4 teaspoon salt
3 Tablespoons butter
1/2 cup lemon juice

You will need one medium sauce pan, one small bowl, and one medium size bowl.  In the sauce pan, place one cup of water, and the sugar together.  In the small bowl, place the cornstarch and 1/2 cup water, whisking until smooth, set that aside.  Now in the large bowl, add the lemon juice and eggs, whisking until smooth.  

Turn the heat to medium and stir the sugar and water together until it comes to a boil.  Pour in the slurry (that's the cornstarch and water mixture) and stir.  Pay attention to this because it will get really, really thick.  Once it comes to a thick gel, take it off the heat.  Now, in the large bowl, with the egg and lemon juice in it.  Slowly add about half of the hot gel.  Make sure you are stirring the mixture while you are slowly stirring the yolk and juice.  Add that back into the sauce pan and turn the heat back up to medium.  Bring this back to a boil, add the butter and stir until the butter disolves.

Pour the lemon filling into the pie crust.  If you are adding the whipped cream, you will want to cool the pie completely, at least one hour, then spread the whipped cream on top before serving.  Follow the directions for meringue, below. 

Crust:
I use Pillsbury pie crust.  It's what I grew up eating and I can't really make it better than that, I've tried and I just like it better.  If you like to make your own or want to try a totally from scratch pie, I really good crust recipe is here. 

To make the crust with no filling is called blind baking.  Once you place your crust in the pie pan, bake it in a 450 oven for 10-12 minutes.  Make sure you poke holes in the crust, all over, before baking.  Or, place some tin foil in the pie pan and add about two cups of rice or dried beans.  You can keep the beans/rice in a jar and use them over and over.  The foil acts only as a holder for the beans or rice, which give weight to the crust helping it not shrink.

Whipped Cream:
One pint of whipped cream
1/4 cup sugar
1 tablespoon vanilla

Add all to a stand mixture or large bowl.  Whip/mix until it is thick and creamy.  It should take about three to five minutes.  You know it's ready when you lift the whisk or beater out of the cream and it holds a peak.

Meringue
4 egg whites
1 pinch cream of tartar

2 tablespoons sugar


Place egg whites and cream of tartar in the bowl of a stand mixer fitted with the whisk attachment. Beat egg whites until soft peaks form and then gradually add sugar and continue beating until stiff peaks form, approximately 1 to 2 minutes.  Spread on filled pie, making sure to cover the edges.  Bake in a 400 degree oven until the meringue is golden brown.


Sunday, August 1, 2010

Icebox Pie


I knew it had been a while since I last posted, but didn't know it had been three months, yikes.  Pie.  Doesn't that work open the floodgate of memories for you, I know it  does for me.  I've always been a pie kind of guy, well actually I'm a desserts kind of guy.  Cream pies are among my top favorite desserts.  As a child my family and I drove my small town to "the big city" of Joplin, MO every Friday night it for dinner and shopping around at the mall.  We hardly ever bought anything, just walked around.  Dinner was always Wyatt's Cafeteria which was in the mall.  My standard meal: chicken fried vealette, cream gravy, mashed potatoes, cream gravy, broccoli, chocolate milk, white roll, and apple pie.  This wasn't just an ordinary apple pie though.  This apple pie was drenched in this decadent cinnamon sauce and served warm.  My favorite part was the crust.  Wyatt's is long gone, but my dreams about eating one more slice of that pie are still very present.  Sad the cafeteria style restaurant is no more prevalent that it is.

I can't remember when or where I came across the recipe for Icebox pie.  All I know is it's the quickest, most simple to prepare, yet full of flavor pie ever.  It just screams summertime.  It's refreshing, tangy, not too sweet, but sweet enough.  The good thing about the recipe list is that you can make it as guilt free as you like.  You can get reduced fat sweetened condensed milk, sugar-free cool-whip and reduced sugar juice concentrates now which will help if you need to cut down on calories.  I usually go with the full fat version.  The other added bonus is that any juice concentrate works just fine.  You can even use the frozen daiquiri mixes with great results.  When it comes to the crust, I usually go with the Nilla or shortbread pre-made crust because the graham crust is completely expected.

Here is all you need to make this wonderful pie:

1 16 oz container Whipped Topping (I use Cool-Whip)
1 14 oz can frozen juice concentrate (I used Pink Lemonade for this one)
1 14 oz can Sweetened Condensed Milk
1 ready made Shortbread pie crust.

In a medium bowl add the milk and concentrate, mix until combined. Add whipped topping and stir until completely combined.  You'll need to be careful if your whipped topping is still frozen because it takes a while for it to get incorporated.  Who wants lumpy pie?  I usually have more filling than I have room, feel free to grab a spoon and eat the remaining filling.

Pour the topping into the prepared crust.  Use the little plastic dome as the cover and secure.  Place in the freezer at least one hour before, I usually let it set up overnight.  Take it out about 30 minutes before ready to serve.  I like to use a can of whipped cream and kind of jazz up the top with little dollops around the outside edge.