Saturday, December 13, 2008

It's a snap!

There's just something about the holiday's that drive me into the kitchen and get my baking blood flowing. It's usually cookies that I crank out, but there is also room in my heart for cakes, pies, casseroles--all things oven I love to turn out. The aroma of cinnamon, ginger, and cloves, can liven up the hardest and coldest of hearts and turn them from brown, dreary, bah humbugs to happy, holiday embracing souls.

The only problem I have with gingersnap cookies is the...snap...part of it all. I'm just not a fan of crunchy cookies, which might put me in the minority. I prefer soft, delicate, tender cookies that have some chew to them. I wanted to search out a cookie for gingersnaps that I could make soft and chewy. My search ended in the hills of Missouri at Silver Dollar City. They have a new culinary school and do cooking demonstrations in a fabulous kitchen. The demonstrations always sell out before I get a chance to purchase my turn ($10 per session), it will happen one day. One of the feature recipes demonstrated is a Ginger Cookie. A little searching on the Internet led me to the recipe.

I knew I wanted to make a soft cookie and I knew I wanted it to be frosted. After a reading about 100-200 cookie recipes this season I decided to frost my soft ginger cookies with royal icing. Kendra and I use royal icing for our gingerbread houses and it makes a great glue when dry. I find it not too sweet, but just the right amount of sweet.


I had all of the ingredients together and was about to take a picture when my helper showed up and was super excited to help. Levi is one of my favorite cooking partners, he's getting very good at his skills even for 3. He loves to cook with his Mom and me. I didn't really have time to get a picture because he was ready NOW to help.

Ginger Cookies
2 cups flour
1 cup sugar (plus some for rolling dough)
1/8 teaspoons cloves
2 tablespoons molasses
1 teaspoon ginger
1 large egg
1 teaspoon cinnamon
3/4 cup shortening
1 teaspoon baking soda
1/2 teaspoon kosher salt
1 tablespoon vanilla
1 tablespoon milk
Preheat oven to 350 degrees. In the bowl of a stand mixer, fitted with the paddle attachment, add shortening and sugar together mixing until light and fluffy. Add molasses, egg, vanilla, milk, baking soda, salt, cinnamon, ginger, and cloves, mixing until combined. Add flour, and mix to combine.

Using a spring loaded scoop, dispense dough and roll balls into sugar. Arrange on parchment lined cookie sheet about 3 inches apart. Bake for 10-15 minutes. 10 minutes yields the soft chewy kind. Remove to a cooling rack and frost with royal icing when cool. Should yield 3 dozen.
Royal Icing
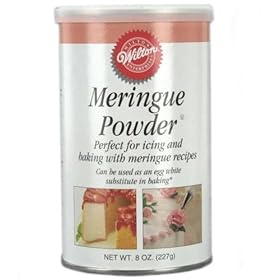
2 Tablespoons Meringue Powder
1/3 cup water
1 teaspoon vanilla
1 pound of Powdered Sugar (2 cups)
In the bowl of a stand mixer fitted with whisk attachment, add water and meringue powder with vanilla. Mix on low. Sift powdered sugar and add to mixer bowl. Increase speed to medium, scraping down sides, and whip until soft peaks form (just barley holds the curl). Remove to bowl and frost.

This will make a lot of icing, so you could easily cut this in half and not have a much. Meringue powder is a nifty little addition to your baking pantry. It will last for quite a while, we've had ours for two years and it's just fine. You can find this powder where cake decorating supplies are sold, and it will be by the decorating section (I know Wal-Mart super centers carry this powder).

These cookies were soft, chewy, had a tremendous flavor and when topped with this smooth, creamy, sweet frosting it was just too much. If you love the taste of cinnamon, ginger, and cloves then give these a try. So good.

Tuesday, December 2, 2008

Titus Special

I love casseroles. A lot of my friends think that is weird given that I do not like my food to touch on my plate AND I eat one thing at a time. I always go with the item on my plate that will be the grossest. Always eat my fries first, then my burger when fast food is on the menu. Typical meals I eat my carbs and starchy foods first, veggies, then proteins last. I also don't typically drink when I eat until I'm finished eating. So you can see why most people would wonder why I like casseroles when everything is all together. I usually just say that it's supposed to be together and leave it at that. What were we talking about? Oh yeah, Titus Special.

The occasion for me to cook is few and far between because I don't' get home in time to get dinner ready and on the table. Our schedule just doesn't work out to where I cook dinner. The last time, or two that I did cook dinner I made a "creation" which isn't really that creative. Turns out that Titus loved it and ate two huge helpings of this pasta saying, "what IS this stuff--I LOVE IT!" "It's called Titus Special." Last night Kendra took Titus to karate and I stayed home with Teensy and Levi, and cooked dinner. Titus Special sounded good so I made it. I think you'll love it too, and you can kick it up several notches adding whatever you like. In yours. Here's the cast of characters:
  • Two pounds of ground beef (or one pound of Italian sausage and ground beef, your choice)
  • Two 16 oz cans of Spaghetti sauce, or your favorite brand
  • One can of diced tomatoes (this is probably 10 oz.)
  • Two cups of elbow macaroni
  • One Onion, diced
  • One Tablespoon dried basil
  • One Tablespoon dried oregano
  • Salt and pepper to taste
  • 2 cups Cheddar cheese
  • 1 cups Parmesan cheese
  • Paprika for dusting
Before we get to cooking, let's talk about onions. Cutting onions has not been one of my favorite thing to do, especially when the onion is older because it seems to have more juice which makes my eyes water more. Whether that holds true or not is up for grabs, but newer onions seem to be tighter and have less juice. I like my onions finely diced, as well as my celery. I don't like obnoxious blasts of celery or onion in my food, I like the flavor it contributes but not the huge chunks of it. First thing, cut off the ends and peel the outer shell off. I usually make a thin slice from top to bottom and peel it away. After that I will make several horizontal cuts, making sure that I do not cut all the way through the onion. Next I make a half turn of the onion and do the same thing, horizontal cuts, making sure that I don't cut through the onion. After that I turn the onion on it's side and slice down which results in the onion releasing uniform, perfect diced cubes of onion which I can then chop even finer, or place in my bowl and use for cooking. I don't make as many cuts this way and it seems to go really fast. Try it, you might like it.

Preheat oven to 350 degrees. In a large pot, bring water to a boil. Now in a large skillet add one tablespoon of Olive Oil and bring up to heat, over medium high. Add onion and cook, stirring occasionally about three to five minutes until the onions are tender. I use sweet onions, or yellow onions, and hardly ever buy white or purple--just because that's what I do no other explanation. Season your onions with salt and pepper ( teaspoon of each).

After the onions have cooked to the point that they are tender, add the ground beef and cook until it is done, about five minutes. I use a potato masher to get the meat broken up and find that this method gives quick and perfect results every time. When the meat has cooked about two-three minutes you'll want to season the beef. If you have dried Italian seasoning use that, about two tablespoons. I like the flavor of basil and oregano so that's what I use. Taste the meat once it is cooked and adjust for flavor. Remember that the sauce will reduce which will intensify the flavors, especially salt, so be careful.

Add the diced tomatoes to the skillet, stirring to combine. [Good time to check on the water it's probably boiling by now. If so add two tablespoons of salt to the water and the noodles and cook to the minimum suggested cooking time on the box which is usually 8 minutes.] Next add the spaghetti sauces and stir. Bring to a slow simmer and cook until thick and bubbly. I usually time this so that the sauce is simmering while the noodles are boiling. Drain the noodles and place back in the pot. Add the sauce to the noodles and stir well. Taste and adjust seasoning to your liking.

Place in a greased 9x13 casserole pan and cover with cheddar cheese. Sprinkle the Parmesan cheese over the cheddar cheese and dust with paprika. Place in a preheated 350 degree oven and cook for 20-30 minutes, until cheese is melted and bubbly. Let stand five minutes and serve. We like green beans with our noodle bake, but you can do whatever you like. It is always better the next day (I'm looking forward to to night!). This makes a lot and can be easily divided and with one pan being frozen for later.

Sunday, November 9, 2008

Joe knows...Sloppy

When Kendra and I got married we had several showers, none of which were driven by greed, from friends and family who wanted to host a shower in honor of our upcoming nuptials. We had a shower in my hometown, at the church where I was currently working, and then one in West Texas where Kendra grew up. It was the shower in West Texas the yielded probably the single most precious gift, a cookbook. Though the cookbook pictured here is not the way my cookbook is bound, it most certainly THE cookbook. I've read this cookbook no less that 100 times over the past 12 years. What makes this cookbook so special is in the stories that the author writes about each recipe. If I ever met Thelma I'd know all about her life because this cookbook has served as an autobiography of sorts. I can't really begins to count how many recipes I have cooked out of here, hundreds to say the least. Amazon has this cookbook listed, out of print as of now, I'd highly recommend this cookbook to the beginner cook--well any cook for that matter.

As with any recipe I can't just make it like it is, I have to change it because I think my way would be better. I'll add more of this or that, change up some of this or that and tweak it here and there until I get the right about of what I'm looking for. This is true with Sloppy Joes. My entire life I have eaten sloppy joes that were made by frying ground beef and dumping a can of "mix" into the skillet and calling it a day. Since it was all I knew I loved it...then one day I made the recipe for Sloppy Joes out of this cookbook and have never picked up the can of mix since. If your family loves Sloppy Joes then give this a try, even if they don't try it you might be surprised. This is a perfect recipe for a beginning cook because the success is guaranteed and the confidence of this cook will be increased tenfold.

The cast of characters is missing because I realized I didn't have one of the ingredients, crucial to the recipe, so I had to run up to the store to get it. So, with your apologies I'll press on with quite a few photos. My wife was helping me cook and had agreed to take over the babysitting of the cooking while I went to the store and she said, "why are you taking pictures of this?" "For the blog, it's my next post." "OHHH kay...it's a good thing I love you." By this time in our marriage my sweet wife is just used to me, nuff said.

Sloppy Joes

2 lb. Lean Ground Beef
1 cup Onion, diced
1/2 cup Celery, diced
1/4 cup Brown Sugar
1 Tablespoon Cavendar's Greek Seasoning
1 Tablespoon Cracked Pepper
1 teaspoon Salt
1 can condensed Tomato Soup
3/4 cup ketchup
3 Tablespoons Prepared Mustard
1 cup water

I usually dice one onion, the size of a baseball, and call it good. I like to keep the dice small just because the flavor is what I'm shooting for not the texture of a hunk of onion. The same is true with celery. Don't get a measuring cup dirty for the celery, you will need 3-4 ribs of celery. Did you know that each piece of celery you break off is called a rib? That's free--not charge. Get your skilled (at least a 3 quart) hot and add about 1 tablespoon of olive oil to it and let it get hot. Add the celery and onion to the skillet and let it cook for about three to five minutes to sweat out the onions. You want the onions to turn from white to clear.

Add your ground beef to the skillet and begin to break that up. I use a potato masher to get my ground beef nicely broken. It's kind of a pet peeve. This step was taken care of by my sweet wife while I was at the store, and she used a masher because she knew I would and that is why I love her xoxo honey!. You'll cook the ground beef for about 3-5 minutes or until most of the beef is no longer pink. Season the mixture with the salt, pepper, and cavendar's. Add your brown sugar (this picture shows the two tablespoons, but add all of the amount listed in the recipe above) and stir to combine. Next Add the ketchup, mustard, tomato soup, and water. Stir carefully so the whole mixture gets incorporated.

One of the most important pieces of advice I can give to a beginning cook is to never cook on high heat. I rarely ever get my stove above medium to medium high. This will help you control the temperature and not lead to those disasters you get in the kitchen with the higher heat.

This will seem very dull and dim, and very runny but don't loose heart because it needs to reduce for about 10 minutes. Let the mixture come to a simmer and stir every two or three minutes, it will begin to develop the thickness that Sloppy Joes are known for. Also, don't taste at this point you'll be disappointed and want to dump the spice cabinet into it. Taste right before serving because the reduction intensifies the flavors and really helps this come into it's own. I've included several photos of the process that this sloppy joe went through to become it's wonderful self.

This is the mixture right after everything has been added.


Here is the mixture at about five minutes. Looks like an active volcano, huh?


This is a blurry close up of the mixture after 10 minutes. Remember I use a camera phone, so don't be hatin my photography. This thickens up remarkably well and the flavor blows the can out of the water.
I serve this on buttered toasted buns with a slice of processed cheese. Kendra made some great sweet potato fries (recipe later) and we loved it. Levi was unsure of this but I know he'll be a lover not a hater once his three-year old pickiness passes. It's fast, inexpensive, easy and really delicious. This will make enough meat for 10-12 buns. I would say I give a good 1/2 cup of the mixture, maybe less.

I use a silicone spatula that is shaped like a spoon. Some call it a spoonula but I think that sounds just ridiculous and refuse to say it or use it. These are great because I can cook the entire dish start to finish and serve with it. This took is really a great addition to your kitchen. I grab this more than any other spatula I have, as a matter of fact I have three of these in varying colors (I think red, white, and blue). The only thing that could make this better would be if this were a solid piece of coated steel. I have a couple of those and love, love, love them. I use this tool for spaghetti sauce, mac-n-cheese, when I make muffins this is great for filling the cups. If you don't have one, the very next time you are around the kitchen gadget wall, look for them and pick one up. Oh and they are heat safe to 450 degrees--how cool is that.

Love the Sloppy Joes, do try the cheese on there.

Tuesday, November 4, 2008

Kick "box"ing: Chocolate Cake

I am not opposed to using convenience items in the least. But one convenience item that I do not use is boxed chocolate cake mix. I've not found one moist enough for my taste or chocolate enough for my taste. I didn't like chocolate cake for years because they were always dry and not flavorful, which is why I like Texas Sheet cake because it's moist and tender. This all changed when I came across this recipe for Chocolate cake. It's moist, tender, great chocolate flavor and most importantly super easy to make.

I made this cake for a Trick-or-Treating party we had with my Mom and some good friends of ours on Friday. I made chili, which we used to make Frito Pie, and this chocolate cake. The trick-or-treating was a lot more fun after this good dinner.

Chocolate Cake:
  • 2 cups sugar
  • 1-3/4 cups all-purpose flour
  • 3/4 cup Cocoa
  • 1-1/2 teaspoons baking powder
  • 1-1/2 teaspoons baking soda
  • 1 teaspoon salt
  • 2 eggs
  • 1 cup buttermilk (I used regular milk this time)
  • 1/2 cup vegetable oil
  • 1 tablespoon vanilla extract
  • 1 cup boiling water
Preheat oven to 350 degrees. Grease and flour two 9" cake pans. I use baking spray which has flour built in and get great results every time.

Stir together sugar, flour, cocoa, baking powder, baking soda and salt in large bowl. Add eggs, milk, oil and vanilla; beat on medium speed of mixer 2 minutes. Stir in boiling water, batter will be thin. Pour batter into prepared pans. While mixing the cake batter up, I put a glass measuring cup full of water, in the microwave and had the boiling water ready for me, didn't have to turn on the stove.

Bake 30 to 35 minutes or until wooden pick inserted in center comes out clean. Cool 10 minutes; remove from pans to wire racks. Cool completely. Frost with Chocolate butter cream frosting, recipe following.

Variations (if you don't want to mess with two cake pans and all that stuff.)

ONE-PAN CAKE: Grease and flour 13x9x2-inch baking pan. Heat oven to 350° F. Pour batter into prepared pan. Bake 35 to 40 minutes. Cool completely. Frost.

THREE LAYER CAKE: Grease and flour three 8-inch round baking pans. Heat oven to 350°F. Pour batter into prepared pans. Bake 30 to 35 minutes. Cool 10 minutes; remove from pans to wire racks. Cool completely. Frost.

BUNDT CAKE: Grease and flour 12-cup Bundt pan. Heat oven to 350°F. Pour batter into prepared pan. Bake 50 to 55 minutes. Cool 15 minutes; remove from pan to wire rack. Cool completely. Frost.

CUPCAKES: Line muffin cups (2-1/2 inches in diameter) with paper bake cups. Heat oven to 350°F. Fill cups 2/3 full with batter. Bake 22 to 25 minutes. Cool completely. Frost. About 30 cupcakes.

Chocolate Butter cream:

1 cup butter, room temperature (2 sticks)
8 oz. Cream Cheese, room temperature
4 cups Powdered Sugar (2lb bag is all you need)
1 tablespoon Vanilla Extract
2 tablespoons Cocoa Powder

Add butter, cream cheese, vanilla, and cocoa into a bowl of a stand mixer fitted with paddle attachment. Mix on low until blended, increase speed to medium and slowly add powdered sugar, mixing until spreading consistency. In the event it's too thick, add 1 teaspoon of milk, or coffee.

Tuesday, October 28, 2008

Ravioli Lasagna


Fall is here! The cool nights and mornings are just wonderful--I love fall. I love cooking in the fall as well because it means casseroles and soups, and chili! Ravioli Lasagna is one of those great fall night meals that will warm you up and make you kiss the closest person to you, well maybe not kiss, but you'll at least be warm and full on the inside.

I found the inspiration for this recipe from a Woman's Day magazine recipe using Italian sausage and ravioli. While it sounded good, I thought I could twist it to my personal taste and make it better. After all it's all about inspiration, right? I hope you do the same. I'm very much a pantry cook, I don't keep much fresh stuff on hand which explains the ingredients, you could use fresh onion and garlic if you wanted to, but I usually don't have it on hand.

Ravioli Lasagna
1 t. Olive Oil
1 pound ground beef ( I use at least 90% lean)
1 pound ground Italian sausage ( I use Jimmy Dean Italian)
1 T. Onion Powder (1 Cup, diced if using fresh)
1 T. Garlic Powder (3 cloves crushed if using fresh)
1 T. Italian Seasoning
3 oz. can sliced mushrooms, drained (you could use 1 lb. of fresh)
16 oz. jar Prego Ricotta Parmesan spaghetti sauce (I happened to have that on hand, any spaghetti sauce will suffice)
10 oz jar Ragu Alfredo sauce
1 pound of Sargento, grated Provolone Mozzarella cheese
Family size bag frozen Ravioli with cheese and spinach or plain.
Fill a large stock pot with water and put stove to boil. If you cover the pot the water will boil faster. For the lasagna sauce: In a medium size skillet, add olive oil to pan and bring up to medium high heat, add meats and cook until just brown, about five or six minutes. If you are using dried herbs, add them at about 3 minutes, if using fresh see note at bottom. Season with Salt and Pepper, adjust to taste. Add the jars of sauce and reduce heat to medium low and simmer to reduce the liquid. Your water should be boiling by now. When the water comes to a rolling boil, add the ravioli and boil 15 minutes. For my 9x13 pan I need 30 ravioli, 15 for each layer. While the ravioli is boiling, check the sauce it will be thickening and may need a good stir. This is a good time to get your salad made and set the table. When the ravioli floats, cook for about two minutes more then drain.
Preheat oven to 375 degrees. Get your 9x13 pan ready. Add 1/3 of your meat mixture to the pan, spread evenly. Place fifteen ravioli evenly on top of the sauce, then 1/3 more of the sauce. cover that with half of the cheese. Add 15 more of the ravioli, remaining sauce and remaining cheese. I sprinkled Parmesan over the whole thing and lightly sprinkled the dried Italian seasoning over just for color. Bake for about 30 minutes until the cheese is brown and bubbly. If time is not your friend kick up the oven to 400. I like my cheese very brown and crisp. Let it stand for about 10 minutes. so it can set up.
NOTE: If you are using the fresh onion, garlic, and mushrooms. Add the oil to the medium skillet, heat to medium high heat and add onion, cook two to three minutes until they begin to turn clear, add mushrooms and continue to cook on medium heat until mushrooms have released their water about 5 minutes, add garlic, cook another two minutes or until water is evaporated. Remove this to a paper plate or bowl and cook the meat.
Serve with a salad and garlic toast.

Just super. I have bought some sun-dried tomato basil bread from Panera Bread company and made garlic cheese bread with it. Simple. Melt about four tablespoons of butter and brush each slice with butter. Sprinkle with garlic salt and lightly sprinkle about a 1/4 cup cheese over all the slices ( buttered nine slices).
This picture is from the Woman's day article which inspired me.
Do try it's so good.

Friday, October 24, 2008

Strawberry Cake with Strawberry Cream Frosting


My sweet wife is celebrating her birthday today and as is our custom in the Spoon house, you get to pick your birthday cake. The boys wanted her to swing toward a sheet cake covered in some comic hero from Target, but Mom--while loving store bought birthday cakes and all opted for a more mature decision. "I think I want Daddy to make me his strawberry cake." The boys dropped the sheet cake idea like a hot potato! They love Strawberries and the thought of those beautiful berries nestled in cake then frosted...priceless. I've always made this cake in two 9" pans and frost it with the accompanying Strawberry Cream frosting which I could eat with a spoon...it's so delicious.

This strawberry cake couldn't be easier once you decide to make a cake for someone you love. The hardest thing to do it chop strawberries and even that can be streamlined into buying frozen whole berries and mashing them. We love this cake in our house and I think you will too. This can be made in a 9x13 just so you have permission to do that ahead of time.

Here are the cast of characters:
  • 1 Box White Cake Mix (I prefer Duncan Hines)
  • 1 3 oz. box of Strawberry Jell-O
  • 1/2 cup Vegetable Oil
  • 3/4 cup Milk
  • 4 eggs
  • 3 T. flour
  • 1 T. Vanilla Extract (the REAL deal)
  • 1/8 t. Almond Extract (just use a cap full, that's what I do)
  • 1/2 cup finely chopped strawberries
Preheat your oven to 350 degrees. Grease and flour two 9" cake pans (or one 9x13) set aside. In the bowl of a stand mixer add cake mix, jello, flour,milk, and oil. Turn on low until mostly incorporated then increase to medium (5 or 6 on my Kitchen Aid) and beat until smooth. Add eggs one at a time, then vanilla and strawberries. Mix just to incorporate (you can mix the berries more if you want them to be less chunky, I went with chunky.) [Is it me or is chunky kind of a gross word?]

Evenly distribute the batter into your two prepared pans. I rarely ever get them exactly even, I suppose you could measure and pour but I just eyeball it and act like it was supposed to be that way. Bake in your preheated oven for 30-35 minutes. The cake will pull away from the sides and a cake tester will come out clean. I have a metal cake tester from Pampered Chef I love, buy one the next chance you get. Cool cakes on wire racks. Frost and refrigerate until ready to serve. I like this cake cold. After you serve the first slices you don't need to worry about keeping it in the fridge any more, there is just something about this cake cold first thing. Try it and see what I'm saying.

The aroma of this cake as it bakes will drive you crazy. Levi was going crazy because he LOVES cake! He was ready to eat that cake right on the spot! He will bring us boxes of cake and say, "Make dis for me, okay DA-DA" Of course you are not able to deny this beautiful brown eyes beauty of anything when those sweet words come out of his mouth. I think Levi has caught the cooking bug because he loves to cook and is very careful to watch exactly what I do. Maybe, just maybe he'll take all of his ingredients and put them into prep bowls like I do...one can only dream.

When I read recipes that say to let a cake cool in the pan, it makes me nervous. I usually get that cake out of it's pan as soon as I can because I'm afraid the thing will stick and I'll have to go outside and scream unpleasantries in my backyard under my breath. There are two stainless steel cake pans I've had since before I was married I picked up at a garage sale that are my favorite cake pans in the world. These babies are heavy and wonderful giving me perfect results every time. I always hand Crisco and flour when cake baking. Bundt baking I use the flour spray, but these pans and I work better together when I give them a massage before they endure the fires of my oven. One other trick I always always follow is to NEVER dish wash my pans. I always hand wash my pans, even the non-stick pans. If you put your non-stick pans in the dishwasher the agents used to make the detergent work will make your non-stick...stick. I just don't want to have any foreign things corrupting my baking so I hand wash, it doesn't take that much time and the dishwater is good to wipe down the counters. And your wife's felt Halloween runner that can't be washed only dry cleaned and we aren't dry cleaning a felt runner so I had to get it clean because Levi was helping me.

Have we talked Frosting yet? No, ok let's do that. Here are the very simple cast of characters, with three no-shows for the picture:
  • One stick of room temperature butter. Take your butter out of the fridge when you first start getting your duke together and it will be perfect by the time is frosting making time.
  • One 8 oz. package of Cream Cheese
  • 2 lb. package of Powdered Sugar. This is roughly 4 cups
  • 1 T. vanilla extract
  • 1/8 t. Almond Extract (cap full)
  • 2 teaspoons of Milk (may need up to 1T)
This is best done in a stand mixer, but since I put the bowl in the dishwasher because I had a three year-old about to decimate my strawberries with a plastic knife and was distracted. I used a large bowl with my hand mixer.

Add the butter and cream cheese along with the extracts to the bowl and mix on low until incorporated. I add the milk here because these two fats (butter and cream cheese) don't really like to come together until their cousin milk comes to play then everyone is happy and we all get along. Milk is the magic elixir, it can be done without it but will take a little longer. The cream cheese and butter will look like this when it's done.

At this point you will want to begin adding the powdered sugar. There will be no less than five times that you feel like this is too much powdered sugar, but stay the course and don't loose heart because it is not, in fact too much. Go slow, powdered sugar is very excitable and like to BURST into emotional outbreaks all over the place. You will need to be patient. In a stand mixer the work is MUCH much less. Slowly add all the powdered sugar. It will be very thick and very much like peanut butter. Add your very finely chopped strawberries and stir or mix. The moisture from the strawberries will give a little more help to the frosting making it smoother and easier to spread. If you want it more red, you could add a few drops of red dye, but I don't want it to look fake. I think the natural attributes that the strawberries give are great and do their job. Just fine. I tried to get as close as I could to the chopped berries, to give you an idea. They are finely chopped.

This is so delicious. I really love to eat this cake. I was talking to a long time friend, and the benefactor of this recipe, Mildred and we decided to try this method using Lemon with a lemon curd filling. I'm a sucker for a good lemon cake so I may just have to try it out. You'll be along for the ride. Plus I love using a microplane grater, I really do.

Tuesday, October 14, 2008

Loaded Mashed Potatoes

Probably the best mashed potatoes that I have ever eaten in my life, and trust me on this--I've had A LOT of mashed potatoes in my life, were made by Swannie Stanczyk (pronounced stanzick) at Mayfair church in Oklahoma City. I don't know what she did to those babies, but let me tell you...they were delicious! She always brought them in the same pot, wrapped in gold towels to keep them warm. I could sit down with this pot of mashed potatoes and eat the whole thing.

Loaded mashed potatoes are a close second to Swannie's, I love these potatoes. The picture to the right is courtesy of the McCormick website and very close to what my casserole looks like, only I put a lot more cheese on top and chives, other than that you have the casserole I make.

For the football banquet I used a great trick my Mom taught me in using instant potatoes, before you hit the ground and run out of the house screaming, calm down and hear me out. I didn't feel like peeling, chopping, boiling, and mashing 60 pounds of potatoes for this casserole. I only had one day to do everything and it would have taken...well forever to get this task done. Here's the trick: use instant potatoes made according to package directions using chicken stock/broth instead of water. I ONLY do this for this casserole, if I were making just mashed potatoes as a side...I would have peeled. Assuming you would not need 60 pounds of loaded mashed potatoes, this recipe reflects the home version, using peeled and mashed potatoes.

Loaded Mashed Potato Casserole

4 pounds Russet potatoes, peeled, diced, boiled, and mashed
1 cup Sour Cream
1 Tablespoon cracked pepper
2 teaspoons Kosher salt
1 cup crumbled bacon (that's about 12 slices cooked and crumbled)
2 1/2 cups grated Cheddar cheese
2 Tablespoons butter
1 cup green onions, chopped
2 Tablespoons parsley

In a medium bowl, add 1 cup of cheddar cheese and 1/4 cup bacon, mix and set aside. Add potatoes to a large mixing bowl, or use the pot in which you boiled the potatoes, mash or use a mixer to mix potatoes. Add butter and sour cream, mixing to incorporate. Add salt, pepper, and cheese, stir to combine. Add green onions and bacon, stir again. Taste adjust seasoning to liking. Place in a lightly sprayed 9x13 casserole. Smooth evenly. Top with reserved bacon and cheese. Bake in a preheated 350 degree oven for 30-35 minutes or until cheese is melted and bubbly. Top with parsley before serving.

You can make the potato mixture a day ahead, or two, and keep in the fridge until the day of. You would place the casserole in your cold oven so the pan can come to temp with your oven, then top with the cheese mixture and bake.

If you use the instant potato route, use one whole box of potatoes (maybe two, you need to yield 12 servings) and make according to package directions using chicken broth/stock instead of water.

These are so good and so easy. The football players really, really liked them incidentally.

Monday, October 13, 2008

Holiday Alternatives: Roast Pork Loin


Last Thursday I had the privilege and opportunity to cook for the Jenks football team. The head coach attends the church where I work, and our Youth Ministry has a tradition of hosting the area football teams for a dinner. Our Youth Minister asked me to cook for Jenks and I was more than happy to jump in. As usual, I was wrapped up with what to cook. Aaron, our Youth Minister, said meat and potatoes were never a bad idea, but beef is so expensive. I went back and forth, back and forth and finally decided on Pork loin. Oh yeah, I was cooking for 150 (most of that football players, so it was like 200--big appetites don'cha know).

Pork Loin is a great cut of meat to serve a large crowd. It is a classier cut of meat, as pork goes, roasts well, and stays juicy and tender while at the same time giving you a nice slice of meat. It won't come apart and be all shredded. I like pork over turkey because I find turkey to be very dry and not very flavorful, but that's just me. So, pork was the choice. Here's the menu for my Football Banquet.
Roast Pork Loin
Loaded Potatoes
Asian-Style Green Beans
Scalloped Apples
Hot Rolls
For this banquet of 150 I needed the following quantities of food:
  • 90 pounds of Pork Loin
  • 10 pounds of Green Beans
  • 20 pounds of apples
  • 40 pounds of potatoes
  • 300 hot rolls
  • 30 gallons of tea
Usually you plan for a quarter pound of meat per person, counting two children under 12 as one adult. For the football team I planned on a little more just to make sure I could reach the bottoms of their bellies. Having a filling side, like mashed potatoes was also a good call because it's a filler. I found the recipe for this pork loin from myrecipes.com which is Southern Living magazine's website. This is one of my go to websites when researching what to do. I altered the recipe by adding a seasoning rub and adjusting the amounts of liquids I used, which made it my own.

Roast Pork Loin

  • 1 4 1/2- to 5-pound boneless pork loin roast (the loins i used were 8-9 pounds each)
  • McCormick Key West Blend Seasoning (If you can't find this seasoning it's equal parts lemon pepper, dried basil, thyme, rosemary, marjoram, and sage.)
  • Kosher Salt & Cracked Pepper
  • 1 10-ounce jar apricot preserves
  • 1/4 cup orange juice (or Bourbon, which I didn't use, but will when I do this at home)
  • 1/4 cup soy sauce or teriyaki
  • 4 garlic cloves, peeled and minced
Heat oven to 325º F. Place the pork in a roasting pan and rub with salt and pepper. In a small bowl, combine the preserves with the orange juice, soy sauce, and garlic and pour over the meat. Cover and roast 30-35 minutes. Uncover and baste with the sauce and the juices that have collected in the roasting pan. Cover and continue cooking, basting every 20 minutes, for about 1 hour longer or until an instant-read thermometer registers 155 degrees F. Remove from oven and let rest 10-15 minutes to finish cooking before carving. I made double the sauce called for and set half of the sauce on the stove brought it to a rolling boil, then reduced the heat and let it reduce while the roast was cooking.

Don't miss tricks:
  • Let the roast come to room temperature. This will give the meat time to absorb the seasonings and not just sit on top. It will also help the meat relax and cook more evenly which will make for a more juicy roast. This is really true with any meat, bring it to room temperature, then roast.
  • You really do need a meat thermometer. When cooking meats it's really critical to get the right temperature. With pork, you don't want it to be under done, with roast beef you don't want it to be over done. It's a great investment, and really important.
  • Remember carryover cooking. Your meat will continue to cook out of the oven as much as 7 degrees, or more. You will want to bring this roast out at 150'ish and by the time it rests it will be up to temperature because of the carryover cooking. I played it safe here and took the roast out at 155 which brought it up to 160. You can do the same as well and not compromise any of the juiciness.
  • NEVER POKE. When you have a roasted meat, it is absolutely critical that you not pierce the meat because you will loose valuable juice and have a dry roast as the end result. Give your roast a chance to get over the trauma of roasting, relax, collect it's self and have all the juices bet back where they need to be, which is not on your platter.
We sliced the meat about a 1/4 inch thick, giving two slices for a serving. to present we ladled the pan sauce over the meat. I highly recommend this roast for a holiday get together if you just can't bring yourself to look at another turkey.

Want anymore recipes from this menu? Let me know and I'll post the whole shebang! Enjoy.


Wednesday, October 8, 2008

How the cookie crumbles

With one lonely cookie resting on the bottom of our cookie jar, I thought I would make a batch of chocolate chip cookies for a little change. We usually make the Oatmeal cookies with Craisin and white chocolate chips, but for some reason chocolate chip sounded good. Chocolate chip cookies are something that appeal to everyone, but only appeal to them if they are "the way" they like them. I can't tell you how many chocolate chip cookies I've eaten in my life, and almost everyone is a little different in some way. People know what they like in a chocolate chip cookie though.

For this recipe I tried an experiment. I'm no scientist, but I do like to find out what works for a recipe. If I'm using Crisco butter sticks for chocolate chips cookies I do not use the following recipe, I use this one. This is my standard go to recipe for Chocolate Chip cookies using real butter. The experiment was to see how flour affected the end result. I like cookies on the thick side with some chew, not thin and crisp. I always add more flour to the mix, more baking soda, and more vanilla, and some almond extract a secret NEVER before revealed, until now.Which make it my "own" recipe, I guess.

As with most of my recipes I have they are not original to me, just tweaked and changed with things added here and there to make a different recipe. For the experiment I decided to go with the original recommended amount of flour (2 1/4 cups) and add my tweaks. The result were thin, crisp cookies that were crunchy. If you are a crunchy, crisp, thin cookie kind of person--this this is your cookie recipe at 2 1/4 cups of flour. If you like the thicker, chewier cookie then go with my recommended amount below.

Chocolate Chip Cookies
  • 2 cup(s) Milk Chocolate Chips, basically one bag of chips
  • 1 cup(s) butter or margarine, at room temperature
  • 1 cup sugar
  • 1 cup brown sugar
  • 2 large eggs, room temperature
  • 1 tablespoon vanilla extract (Pure vanilla extract please)
  • 1/8 teaspoon almond extract, basically a cupful
  • 3 cups unsifted flour
  • 1 1/2 teaspoon(s) baking soda (I just use a heaping teaspoon and call it good)
  • 1/2 teaspoon(s) salt
Preheat oven to 375 degrees. Fit stand mixer with paddle attachment. Add butter and sugars to bowl and beat on medium speed 5 minutes until light and creamy. Add extracts and one egg, mixing to incorporate. Add remaining egg, mix to incorporate. Add flour, salt and soda to bowl. Mix until flour is just incorporated (no white showing) add chips and mix to incorporate. Using a medium sized spring-loaded scoop place scoops of dough on cookie sheet about 1 1/2- 2 inches apart. Bake for 9 minutes. Remove to cooling rack.

And now, for the tips that I've learned along the way:
  1. Room temperature butter DOES make a difference. I knew I was going to be baking, so I put the butter and eggs on the counter about 30 minutes before I started cooking and it was great. You can always nuke the butter for 15 seconds to get it soft. Here's why it's important: The fat (butter) and sugar need to become one with each other. The softer the butter the more open it is to welcoming strangers into it's life--like sugar. Sugar is a crystal which means it takes a bit for it to break down.
  2. Mixing butter and sugar together DOES make a difference. I usually mix my butter and sugars together for at least 5 minutes, usually 7-10 minutes. This give the butter time to whip up and the sugar to break down. It still feels grainy, but not coarse as if you were mixing by hand. The dough should be off-white in color and fluffy. Think mashed potatoes here.
  3. The picture to the left shows the cookies with 2 1/4 cups flour and the full 3 cups of flour. The cookie on the left, the darker one, is the 2 1/4 cup cookie. This was same pan, same scoop, same temp, just the deleted flour. See how the cookie spread out more? It's also much darker. I'm guessing because there is more sugar than flour and that changed how it worked. So, flour matters. The 2 1/4 cup dough was wet and sticky while the 3 cup dough was dry and tacky. The 3 cup dough was firm, kind of like play dough--held it's shape. I think the extra flour helped the cookie dough not break down and spread out as much.
  4. The picture to the right was taken to show what the 3 cup dough looked like baked. See how cakey it is? There are some air pockets along the edge, but the center is chewy and delicious. The 2 1/4 cup dough had air pockets all through the cookie. The picture I took was horrible. I'm working with my camera phone here, folks give me some slack. This is how I like my cookies so I use the 3 cup dough.
  5. Baking time matters. My oven takes 9 minutes to bake a cookie to perfection. At the point I take out the cookies, they are just starting to brown on the edges but still look somewhat moist on the top. There is a term in cooking circles called, "carry over cooking." Basically, carry over cooking means your food will continue to cook out of the oven. It's especially important when cooking meat. With cookies I know that the cookies will firm up and be perfect at 9 minutes because I let the 2 minutes it takes for these babies to cool down to cook some more.
I didn't try to make this rocket science or some secret formula I'll take to my grave. It's just what makes my cookies the kind of cookie I like. As my boys grow up and learn to cook more and more, I'll share these tips with them and help them understand why I do what I do--it works for me. There are textures, which affect taste, that I look for in foods and learning the tricks to get that texture every times is important to me.

Maybe this is the recipe you are looking for in a chocolate chip cookie, maybe not. Hopefully it will help you determine what you like in a cookie and go for that. Crispy and crunchy cookies will have more sugar than flour, cakey and chewy will have more flour than sugar.

I'm going to go eat one of these now, can't take it anymore.

Wednesday, October 1, 2008

XOXO OXO


When it comes to cooking I have a set number of "go to" items that I always use first and will even run a sink of dish water to wash that item if it's dirty. My Cutco french chef's knife, or these wonderful wooden spoons I found at a great gourmet store in Joplin. They are readily available in most cooking stores, made of beechwood I think. I have three different sizes of these spoons and just love them to death. These are the things that put me at ease in the kitchen and give me the comfort and confidence to tackle a recipe or project. I know my tools, I know how they will work and what I can do with them and we just work well together. Do you have that relationship with your kitchen tools? My Granny had a knife she called fingers. Fingers was a pairing knife, but she used that knife for every single cutting project in her kitchen. De bone a turkey--fingers. Peeling a tomato--fingers. It was her knife and she used it for everything. You have to trust your tools.

There are few things in my kitchen that I will run out and re-purchase immediately upon the destruction of the original item. Take my turkey baster for instance, it has long been dead and yet I don't have a desire nor even an inkling to go out and replace this huge syringe. The baster met an untimely death when I needed to lift some watery greasy liquid off a skillet of slowly simmering meat, only to realize the one of my two boys had used it in the tub as a toy and not completely emptied out the watery sudsy mess which left a nice hunk of moldy goo in the bulb. This moldy goo decided to take it's leave into my pan!!! Meat ruined, blood vessels at maximum pressure I frantically tried to clean the thing, leaving it up to my dishwasher to kill any other rouge germs that might have been lurking about. I guess my dishwasher had a thing against it too, because the poor thing was evicted from its utensil basket onto the heating coil and cremated.

When it comes to measuring liquids my go to measuring cups are made by the OXO company. This company has an extensive line of grip friendly tools gadgets, trash cans and anything else you would think of at your disposal. I'm a big fan of OXO products and would highly recommend the purchase of any OXO product. Don't get me started on the OXO peeler please--love that thing [resisting tyraid on OXO peeler]. The measuring cups are just wonderful. I have quite a few OXO products, even my dustpan and whisk broom are OXO.

I love these measuring cups because they have a great no slip grip handle that is far enough away from the bowl of the measuring device that my fat man-sized fingers can grip it. I also love the angle measure marks. You do not have to have a degree in contortion to see how much liquid you are pouring in, or squat down to eyeball the precise measurement of liquid. When baking, precise measurement is critical to your recipe. A lot of bakers will tell you that weighing the dry ingredients is better than using a measuring cup, while I believe that to be true I'm not running out and buying a scale nor am I converting all of my recipes over to weight ACK!. With the angle design you can see the amounts as you look down upon the cup then pour to get the precise measurement you need.

There are four sizes of measuring cup that they carry. A 4-cup measure, 2-cup measure, 1-cup measure, and mini-measure. I did see a 2-cup stainless steel measuring cup on their website that just got me all a twitter, I think that would be cool to have. The mini-measure, which the website sells them in a 3-pack I was super jealous that I didn't get three!, is great for measuring vanilla, milk, or other items you need a Tablespoon of. It goes up to 4 tablespoons which is a 1/4 cup, right? 16 Tablespoons in a cup so 4 tablespoons would be a 1/4 cup, right? Let's just run with that and call each other smart!

I do have the traditional glass measuring cups, and use them on occasion, but I really like using the OXO. The only draw back is if you are whisking up a salad dressing or mixing something. The way in which the cup is designed does not lend it's self well to mixing. It can be done, but it's not fun and a little awkward. Much like I was from 1982-84 while in full puberty. I'd trip over my shadow!

I pulled out my 4-cup OXO measure cup the last week to measure buttermilk for a recipe I was making and when i picked up the cup there was milk on the counter. Curious I didn't think I had spilled the milk, usually pretty careful when pouring. I'm pretty practiced at it. So I walked over to the sink to get a rag to wipe the counter and sat the measure down to get the rag wet. When I picked it up...more milk! Could. There. Be. A. Crack. In. My. Cup? Sure enough a huge crack all along the bottom of my cup. Blast! "BOYS!"Titus didn't admit to causing the crack, Levi just smiled. Obviously my cup was used for a purpose not in it's original design and "cracked" under the pressure. That night we bought another one, I just had to have one.

Target has a nifty little boxed set of measuring liquid and dry cups, spoons, and something else. It's a great idea for a wedding gift. I looked on their website and could not find it, but I know they have them in the store.

What gadgets do you love and can't live without? Hopefully when you buy these you will add them to your list.

Tuesday, September 30, 2008

Harvest Cookie

I have to admit that when it comes to experimenting with recipes and baking I take it easy, no chances. I pretty much follow that philosophy in everything I do, not take chances. I've never been a dare devil, even as a boy I was not prone to doing things that took a chance. One of the good things about cooking is that there comes a time when you know that things will just work because all of the components that come together are so complementary. This trick worked with I was whipping up a batch of Oatmeal cookies and had the thought, "What about not putting in raisins but craisins and white chocolate chips?" This addition came to become my families top favorite cookie. We make at least one batch of these a week in my house. If you come to my house you will most likely find these in our cookie jar.

My boys have started helping me bake and while I desperately want to pass on my love for cooking to them there are times that their help gives me a twitch. Levi is always the first to come a running, "Dada whatcha doo-wing, I see, can I help?" There is no way you can turn away this brown eyed beauty no way. One of my favorite things in all the world is when he picks up an egg and calls it, "baby kicken." This sprang from him asking me what an egg was to which I replied, "a baby chicken." Ever since then we've been killing and cooking baby chickens! How savage!

Harvest cookies will be added to my list of fav's. I went through an oatmeal scotchie phase about a year ago and passed the phase before I went through all of the butterscotch chips in my pantry. I was originally going to make chocolate chip cookies, but saw half a bag of white chips and a then the three bags of butterscotch chips staring at me and though, "these would go well together, maybe." So, I used my standard chocolate chip cookie dough recipe and used butterscotch chips and white chips instead of chocolate chips. The end result was a delicious, soft, chewy, reminds me of fall cookie. Let's get with the program...the cast of characters:

  • 1 stick Crisco® Butter Shortening Sticks
  • 1 1/4 cups firmly packed light brown sugar
  • 2 tablespoons milk
  • 1 tablespoon vanilla extract
  • 1 large egg
  • 2 cups Flour
  • 1 teaspoon salt
  • 1 teaspoon baking soda
  • 1 (6 oz.) package butterscotch chips (1 cup)
  • 1/2 cup white chocolate chips


My wife does an amazing job of decorating our house for Fall, and Christmas which are our two favorite times of year. She found these cool place mats at Wal-Mart of all places and has used them in the kitchen to adorn the counters. The Crisco is barely in the shot, thanks to my...helpers.

I do want to encourage you to begin practicing getting all of your ingredients measured and ready before you start baking. It really does speed up the process and also let's you know if you are out of something you thought you had (lesson learned over and over). This is a French cooking term called Mis En Place (meezenplahce) which simply means everything in place. This one step will relax your cooking experiences and make everything so much easier.

Preheat your oven to 375 degrees (is this the new 350?). If you are a parchment/silpat baker go ahead and get your pans ready. I use a thin metal Analon cookie sheet and love it.

With the paddle attachment on your stand mixer, place the brown sugar, Crisco, vanilla, and milk (I added the vanilla to the milk in my OXO mini-measure) in the bowl and mix on medium speed for at least five minutes. You will want to scrape down the bowl and make sure you scoop up from the bottom at least once in this process. I've found that this is a key step in good cookie baking. You really need to get that fat and sugar together and really liking each other...becoming one. If I were a chemist I'd be able to tell you about the chemical relevance to this step, but I"m not, all I know is that this step has made the difference in my cookies outcome. If I under mix the fat and sugar then I don't the texture I like in a cookie. Your batter should look something like this once you have mixed the wet ingredients together. If you don't have a stand mixer, you can use a hand mixer (that goes without saying, right?) See how the mixture looks whipped, smooth and creamy. My helpers were ready to start licking at this point. Patience I said, patience. One more thing about having all of your ingredients pre-measured and ready is that you helpers are less likely to spill the ingredients because there is one motion required--the dump.

Once you have mixed this for five minutes add your egg [baby chicken], salt, and baking soda mixing until the egg [baby chicken] is incorporated and not apparent. At this point you will add your flour, slowly so you don't create a flour smog in your kitchen. Turn your mixture down to it's lowest setting (mine says stir) and mix until just combine. The last step is the addition of the chips, mixing to just combine. There was a time when I would not mix flour with the paddle attachment, opting to hand stir. I've since come to my senses and just exercise restraint in the mixing. Only until combined.

The dough looked a little wet to me so I added a little more flour (I adjusted the recipe above with the additional flour so don't worry, it's all fixed upstairs) which helped me get the texture I wanted.

I used my medium spring loaded scoop to portion out the dough on the pan. Bake at 375 for 9-10 minutes. Your cookies will look light brown and with the glories of carry over cooking have a moist chewy texture that is just delicious with a glass of ice cold milk. I had to take a picture of these cookies right out of the oven because I think it goes to show how useful and appropriate a spring loaded scoop is for baking. Uniform and consistent cookies all the same size that will leave you with every cookie baked just right and not having one cookie that is a crouton and one cookie that is play dough. I yielded over 3 dozen cookies (I think it was something like 40 cookies).

The fat content of these cookies means you will not have to grease your cookie sheet. I have a coated Teflon, making it really dark, cookie sheet but think if you were to use a shiny metal sheet that they wouldn't stick at all. The color of this cookie remind me of candy corn, but more of Fall. With all of the golden brown, white, golden yellow bits.

These are a sweet cookie which doesn't bother me. Kendra like, didn't love, but liked them. She's not a super sweet cookie lover though. All three of the kids really like them, I'm guessing because they were really sweet. My Dad and Step Mom happened to drop by for a visit (wound up eating dinner with us) and we served these with Blue Bell Homemade Vanilla Ice Cream. Dad is not a fan of butterscotch but did like these cookies. I say that to say if you don't like butterscotch then go ahead and give these a try, I think you'll be surprised. I'm sure there are more than a few people who love to add nuts to their cookies--I'm not one of them, but think if you were to add nuts to this cookie it should be pecan or walnut...maybe macadamia.

Fall is a fun time of year and one of my favorite seasons, probably my favorite truth be told. Winter is good, but Fall just has a warmth about it that I find hard to describe. I'll just say Fall is the most comfortable of all Seasons and fits me to a tee.

Tuesday, September 23, 2008

Pull your pork not your leg

Do you ever feel so busy that you are certain you will meet yourself coming while you are going? I'm not sure there is a time when my family isn't just running, running, running. There are times when we just have to stop and not do anything to decompress. I have come to love my Crock Pot for the simple fact that I can have a dinner ready for my family and not have my family wait.
My version of Pulled Pork couldn't be more easy because the ingredients list is short...three short ingredients--no joke. Let's get this party started, what do you say? The cast of characters are:
2 trimmed 3 pound Pork roasts
  • 1 bottle of Root Beer. More on this later.
  • 1 bottle of Barbecue Sauce.
This particular bottle of barbecue sauce was a 32 oz. bottle of sauce and the root beer was 16 ounces. I also had Lawry's seasoned salt that I dusted on the roast, it's is great either way.
About this Root Beer. When I made this roast I didn't want to buy a 2 liter bottle, wouldn't use it all. I didn't want to buy a case and as luck would have it my grocery store had a section of micro brewed root beer! Who knew that there was micro brewed root beer? Not me. I thought the name of the root beer was really cool and the bottle looked cool. One sip and I knew that the stuff was super good. I don't know who Virgil is, but his Mother would be proud. I did come to the conclusion that a good quality root beer would be great because the cane sugar that is used really helped the roast. If you can only find or use A&W or Bargg's that will be great, too. Just use 16 oz.
Place the pork roasts in your crock pot and season with Lawry's seasoned salt or other favorite seasoning blend, I have several which I'll talk about in a post. Pour the root beer over the roasts and place the lid on the crock pot. You can cook this roast on low 6-8 hours or high for 3-4 hours. I put this on before we left the house, knowing we would be home around 5-6PM and it cooked all day. I'm no chemist, but I think the carbonation in the root beer, helps the meat tenderize. Anyone have an idea about this? I'd love to learn and know about the power of carbonation in tenderizing meats, everyone needs to learn something every day, huh?


When the roast is done it will look like this, on the left. The root beer has really reduced, the fat and tissues in the pork have broken down, you can see some of the fat which has released out of the roast on the edge. The meat is SUPER tender and moist.


At this point you will no longer need the root beer. Please do not feel the temptation to sip this root beer...let it go. Pork infused, reduced root beer would taste nasty. Place the pork on a plate pour off the root beer and then put the pork roasts back in the crock pot.
Using two forks, break up the pork roast, it will shred lickity split and very easily. This shouldn't take very long at all, maybe 3 minutes. I used the forks scissor like to shred the meat. It will look something like this when you are done shredding the meat. It's very moist and not dry at all. At this point pour in the barbecue sauce. I like my pork...saucy. You may not like your pulled pork with as much sauce, but I think it's worth a shot the first time. Ok, brace yourself. Get ready. Grab a Kleenex...no get the box you may just tear up when you see this beautiful dish come together.

I serve this on buttered and toasted buns. This is sweet, tangy, tender, juicy, and so delicious. You can turn the Crock Pot on warm or keep it on low to heat the pulled pork up.
I made this recipe when our church preschool asked me to cook for their annual Hoedown dinner. There were 400 people who came which meant I would need to cook over 200 pounds of pork. I didn't butter and toast the buns. I did make from scratch cole slaw and potato salad. In case you are curious you have to peel 100 pounds of potatoes to feed 400 people. I'm sure there were folks who didn't like the pulled pork, but many people loved it a lot.
Give it a try, you'll love it, your family will love it, and people will casually call you and invite you over to a party and when you say, "what can I bring?" They will immediately say, "how about that pulled pork." It's that good.