Have you ever had a craving for something from your childhood, or not so recent past, and gone on a quest to discover that same taste? It happens to me all the time and most recently involved some meatballs I ate as a child that came back from my past with a powerful craving. As a child I ate these mostly at church suppers, but the flavor is something that stuck with me. There are a couple of sites I trust on the net, of course I had 250 cookbooks at home that I could rummage through, the net is usually faster. I remembered reading a recipe on the Pioneer Woman's blog about barbecue meatballs and thought they looked similar. I also know about porcupine meatballs which involve rice, that was not my goal. I would up going back to Pioneer Woman and using recipe as the base from which I created my recipe. With fingers crossed I set out to make them, and happily discovered a great old friend.
I guess before I go any further I should warn you that these aren't the type of meatballs you would put over pasta, or in a pasta sauce. They aren't that kind of meatball. It would be better for you to think of these as teeny tiny meatloaves in a savory, tangy, sweet sauce. I think they should be served with scrumptious mashed potatoes and green beans, and some great french or garlic bread, but you could do whatever you feel like doing. We take a lot of food to friends who are in need, and I think I'm going to keep these babies up my sleeve and pull them out when called upon to take food to a friend in need.
The hardest thing about these is browning them in the skillet before you put them in the pan, for real. Unless, of course, if you have a problem touching raw meat, then it will be a little yucky and painful for a while. I use our stand mixer to whip the meat mixture into shape, then I go in with an ice cream scoop to make the round shapes. I have to do that or I would not have uniform meatballs, it's just me. I found that setting up a station in which I scooped the meat, rolled in flour then placed in the pan to brown, followed by placing them in the 9x13 worked great. It kept the mess to a minimum. These can be made the night before, placed in the fridge and baked the next day...if time is something that isn't always on your side.
Meatballs:
2 pounds ground beef (or any combination of ground meat you like)
1 cup rolled oats
1 cup milk
1/2 onion, finely chopped (pulverize it)
2 cloves of garlic minced
1 teaspoon Kosher Salt ( I used Jane's Krazy Mixed UP salt)
2 teaspoons black pepper
1 large egg
1 cup flour (for dredging)
In the bowl of a stand mixer, fitted with the hook attachment, add all ingredients and mix on low speed until combined, then on medium for 3-4 minutes until smooth and combined. Using a large spring loaded scoop, scoop meat and roll into round balls, roll in flour and place on a cookie sheet. Continue scooping and rolling until all the meat has been used.
Preheat a large skillet over medium heat. Add two tablespoons of butter and two tablespoons of olive oil. Add meatballs and brown on all sides, no need to cook all the way through. Place browned meatballs in a 9x13 pan sprayed with non-stick cooking spray.
Sauce:
2 cups ketchup
4 Tablespoons sugar
4 Tablespoons brown sugar
6 Tablespoons vinegar
4 Tablespoons Worcestershire sauce
1/2 onion, very finely chopped
1 tablespoon pepper.
Place all ingredients in a mixing bowl and stir until combined.
Pour sauce over meatballs, cover with aluminum foil and bake in a preheated 350 over for 30-45 minutes.
No photographs, sorry.
Friday, February 12, 2010

Thursday, February 4, 2010
Bow Tie Chicken

I love to cook and sadly don't really have a lot of time to get in the kitchen and cook up main dishes. My wonderful wife is the main, "hash slinger" in our family and does a great job with our family meals. We try to eat dinner between 5:00-5:30 every night, giving us plenty of time to get our three babies (7, 4, & 3 years old) ready for bed by 7:30-8:00pm. Sitting around our dinner table as a family every night is very important to us and we guard that time and hold it dear to our hearts. Our recent snow and ice events gave me an opportunity to give my wife a much appreciated break from dinner preparations. To my surprise my family loved every singe one of the dinners I prepared--everyone! Naturally I was excited, so I'll be sharing the recipes with you and hoping for your success, too. Trust me, I don't usually have that much luck because our children are picky eaters, but I hit a home run with Chicken and bow ties.
This dish is very comforting and creamy, reminding me of chicken and noodles--only much easier. I would say the star of the show is the creamy cheese sauce. The ingredients are easily kept in your pantry, and usually things most people have on hand. There were no leftovers with this, which is a sure sign of it's success, right? Prep was a snap, I made this in a large skillet and used another pot to boil the pasta, however you could easily make this a one pot meal, using your dutch oven or large stock pot. I'll have the suggestions for that in the notes section at the bottom. Additionally you are free to add and change up the veggies, really the possibilities are endless with what you can do. Let's get started.
- 4 skinned and boned chicken breasts, cut into bite-size pieces
- 16 ounces uncooked bow tie pasta
- 1 cup chicken broth
- 1 celery rib, chopped (about 1/2 cup)
- 1 small onion, chopped (about 1/2 cup)
- 1 clove of garlic, crushed
- Salt and pepper to taste (probably about 1 tsp. salt for our taste; and 1T. pepper)
- 1 medium carrot, chopped (about 1/2 cup)
- 1 (10 3/4-ounce) can cream of mushroom soup
- 1 (8-ounce) package pasteurized prepared cheese product, cubed
Preparation
Bring 1 quart salted water to a boil in a large pot. In the meantime get a large skillet up to medium heat. Add pasta to water 8-10 minutes or until tender; drain. Keep warm.
Melt one tablespoon butter and one tablespoon olive oil over medium-high heat in the skillet; add celery, carrot, and onion, and cook 5 minutes or until tender, add garlic and diced chicken, cooking until the chicken is cooked, should take about 7-8 minutes. Stir in soup, cheese, and cup chicken broth, stirring until cheese is melted. Toss with pasta; garnish, if desired. Serve immediately.
Notes:
- To make this a one-pot dish. Boil your pasta in a large dutch oven (you can add the chicken, too if you want) until done, then drain and set aside. Using the same pot, add the butter, oil, and garlic and saute until the onion is tender and clear. Add your broth, soup, and cheese, stirring until the cheese melts, then stir in the pasta and chicken.
- The amount of vegetables you could add to this is unending. I would love to add mushrooms and frozen peas next time.
- I'm also thinking that I might cook a few slices of diced bacon to the skillet, set aside then skip the butter and oil, and cook my chicken and veggies in the bacon fat, using the bacon bits as a topping. How good does that sound?
- A side salad would be the only company that this dish needs, we skipped that and just ate garlic bread. The sauce loves to jump on bread! It's really good.
Thursday, December 31, 2009
Cheeseball
 The cheese ball is something that you either love or hate. I know of few people who kind of like cheese balls, but I do not doubt that such an animal exists. I've made this cheese ball for over 10 years and count on this humble party food staple to stretch my snack table without breaking the bank. The flavor is creamy and savory with the added benefit of chopped pecans that enrobe the pale yellow delight. I like this served with crackers, pretzels, pita chips, or bagel bites. I've even seen some folks put this on an apple and eat it, but don't count on me to confirm whether or not this cheese ball is good on an apple! Let's get started and we'll talk about some really cool and different ways to present this cheese ball. Well, ok, you can use my ideas for your cheese ball recipe if you want--I guess.
 Here's what you will need to pull this thin off, the ingredient list is super easy:
16 oz. Cream Cheese
16 oz. Cheddar Cheese (I usually use a cheese blend)
One onion
1 Tablespoon Worcestershire Sauce
1 teaspoon seasoned salt
1/2 cup chopped pecans

Rough chop the onion and place it in the bowl of a food processor. Add one block of the cream cheese and seasoned salt. Pulse until the mixture is smooth and combined. You do not have to have a food processor to make this cheese ball. I like to use a food processor because it really gets the onion minced up. If you don't have a food processor I would suggest that you either grate the onion, or chop the dickens out of the onions to make them super minced and mushy. Your goal is to have a creamy and smooth mouth feel.

After you have pulsed the onion, half of the cream cheese, and seasoned salt together, go ahead and add in the Worcestershire sauce and give it another pulse. This is what gives the mixture it's pale yellowish brown appearance. Once you have pulsed together these four ingredients, dump it into a large bowl, we will have to go manual from here on out.
 This set of Pyrex mixing bowls is close to my heart. I'm writing this post from my Mom's house in Missouri, which explains the better quality of my cell phone photographs because she has fluorescent lighting. Anyway, these bowls have been with me my entire cooking life. I learned to cook using these, and many other tools that Mom still has. We won't talk about the can of cloves that she has in her spice cabinet that has a date stamp of 1972!
So, after your little trip down memory lane. Dump the mixture you've pulsed into the sentimental Pyrex mixing bowl (that mushroom design is really ugly, what were they thinking?) and add the other 8 oz. of cream cheese and the grated cheese blend. Get busy with a sturdy spoon of silicone spatula and mix until the cream cheese is completely combined and smooth. If you food processor bowl is large, you can do this step in that bowl. Mom's is only a 2-cup processor.
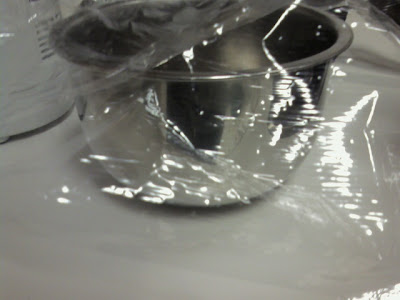 If you like to get your hands dirty and want to skip this next step feel free. Who am I to judge. I like to get a small bowl and place some plastic wrap in the bowl, then dump the mixture into the bowl so I can form the cheese ball into...well a ball shape. It's really much easier to me.
This is what the mixture looks like when you get it into the bowl. Just fold over the plastic wrap and press lightly to form the cheese ball into a dome shape. From this point you can place the bowl in the fridge and keep it until ready to use, or you can peel off the plastic wrap and flip the cheese ball onto a plate, peeling the plastic wrap off. Use that spatula or spoon to smooth over the rough places. Press in the chopped pecans.
This cheese ball is really at it's best flavor once is has a few hours to recover and pull itself together. The Worcestershire sauce and onion really love each other and come to the flavor party big time, they are somewhat cocky and try to take over, but never fear the cheese is the true star of this show.
Ok, now for the ideas I promised:
- You can roll this cheese ball in other things. You could use sliced almonds and "tile" your cheese ball, which would be really sharp. Paprika or parsley are other toppings that make this cheese ball really delicious.
- Place your plastic wrap on the counter, and lay the mixture out in a log. Roll the plastic wrap up around the cheese ball. Using your hands shape the cheese log into it's long log form. Then roll in whichever topping you wish to use.
- This doesn't have to be a cheese ball at all! Mix the chopped pecans into the mixture and place the entire mixture into a container with a tight fitting lid and you have a super spread that you can pull out for a snack, or super casual card or game party. This will keep for a week or more (it won't last that long, trust me.)
- Substitute hot sauce for the Worcestershire sauce and everything changes. This mild mannered little cheese ball becomes a super spicy whippersnapper.
- Finally, here's the best idea. Cheese ball pops! Use a spring loaded scoop, and drop the mixture onto a waxed paper lined cookie sheet. Chill for 30 minutes to let the cheese pops set up, then remove from the fridge and roll in pecans or the afor mentioned toppings. Finally poke in a pretzel stick and viola you have a cheese ball pop. Place these on your serving platter. This idea is really cool, because it takes the humble cheese ball to a whole new level and totally impresses your guests.
Give this yummy, yummy treat a try I think you'll agree its super good.
Monday, December 21, 2009
THE Holiday Cookie aka. NICU cookies

Have you ever taken a bite of something and immediately known that, "this" would be in your life forever? I have to say that after one bite of this cookie, almost 15 years ago, I knew I would love this cookie forever. Our friend, Donna Layton, makes these every holiday and has forever. They are soft, buttery, fruity, and just delicious.
My daughter, Emma, was born premature (29 weeks) and spent 42 days in the NICU of St. Francis here in Tulsa. She was born November 30th, which meant a different kind of Christmas for my family that year. The staff was amazing and touched us in a way that is still fresh in our hearts to this day. I'm not sure we will ever be able to repay the love and appreciation we have for their care of our daughter. One expression of our gratitude was a batch of Raspberry Thumbprints I made and took in a Red toile tin. Dr. Anderson, Emma's Neonatologist, just happen to love these cookies as it reminded him of his home, "up North." And so began my commitment to the staff that the red tin would always be full of cookies for them. Kendra or I one would bring that tin home, empty, and take it back full. We made double batches (7 dozen total) of these cookies every three or four days for 42 days. Everyone knew what that red tin meant when they walked into the break room. We took that same tin back at Emma's one and two year "anniversary" of her dismissal and plan to do the same for this her, third, anniversary (coming up in February).
For the dramatic and beautiful end result, there really isn't an easier cookie to make. Five ingredients in the dough, some jam, and a glaze is all that comes to this cookie party. There are really two stars that shine in this cookie, butter and almond extract. The cookie dough is really a shortbread that is light and buttery. The almond extract is there, not obnoxious or showy, but does indeed make itself known. As far as jam, the world is your oyster. I've used seedless blackberry, red raspberry, raspberry, and apricot, but you could use any kind of jam you love. I think the hardest thing for me is making the perfect indention for the jam to rest in while baking. I have a coffee scoop that is dome shaped, and it works like a charm, so that is what I use. Consistency is the key. Also, trust the timer on this cookie, because the will not brown, at most on the very outer edge if at all, they just burn.
Thumbprints
1 Cup butter, room temp
2/3 cup sugar
1/2 teaspoon almond extract
1/2 teaspoon vanilla extract
2 cups flour
Jam (maybe a 1/2 cup)
Preheat oven to 350. Line cookie sheets with parchment paper and set aside. In the bowl of a stand mixer, add sugar and butter. Mix on medium speed 3-5 minutes or until light and airy. Add extracts and flour. Mix until just combined. Using a small spring loaded cookie scoop, place balls of dough on cookie sheets (2 inches apart). Make an indention with your thumb and add 1/4 teaspoon of jam to each indention.
Bake for 14-18 minutes. Remove from pan and let rest on cookie sheet for one or two minutes. Remove to a wire rack and cool completely. Drizzle with the following glaze.
Glaze
1 cup Powdered Sugar
1 tablespoon milk
1 teaspoon Almond extract
In a medium bowl add powdered sugar, milk, and extract, whisk until smooth. Add drops of water or milk to thin to your specific taste.
NOTES:
- If you want the cookie, end product, to be smooth you can roll the dough in your hands to kind of knock out the scoop marks. It is pretty, but a step I can afford to live without, trust me rolling almost 100 dough balls is not my idea of fun.
- The indention is tricky. Too shallow and the jam spills over the side, too deep and it ruptures out the bottom. My trick is to push just until the dough spreads, you want the indention to be about the depth of a 1/2 teaspoon and no more.
- When the cookies come out of the oven, let them rest. You will not be able to transfer them to a cooling rack immediately out of the oven because they will fall apart, trust the voice of frustrated experience.
- I use two cookie sheets and alternate. It gives each sheet time to cool down before you drop more dough on the sheets. The dough is delicate and will start to melt while you are filling with jam.
- I use one of my daughters old baby spoons to fill--it's perfect!
- I've made these cookies bigger and don't really love the end result.
- The glaze is good on a flip flop. Seriously, it's just a wonderful glaze that is pure white and smooth, it hardens to a shiny bright beautiful result.
Tuesday, December 15, 2009
Chicken pot pie in Biscuit bowls
 With winter being right here in our lap, I can't help but feel drawn to warm, cozy, creamy suppers. Potato soup, Chicken and noodles, casseroles, all just warm inside and out. That coupled with the baking we do during the holidays makes for a warm home and hopefully warm memories. Speaking of memories, can I just tell you I love Chicken Pot Pie! I was an adult before I had a homemade chicken pot pie, but as a child I loved the Swanson Chicken Pot Pies. Mom always had plenty of frozen pies in the freezer so I could bake them up anytime I wanted.
I had a very methodical and meticulous way of eating them, too. Go figure. I ate the top crust first, then the filling, saving the bottom crust for last...it was just delicious.
These biscuit bowls are fun to make, and super delicious. There are a ton of shortcuts that will fit just about any time crunch, and I think your family will love them. You can substitute turkey for the chicken, of course and add another bullet to the chamber of leftover shotgun suppers.
- 2 tablespoons butter
- 1/2 cup finely chopped onion (about 1 small onion)
- 1/2 cup finely chopped celery (about 4 ribs)
- 1 cup diced red bell pepper (you can use one small pepper)
- 1/2 cup sliced fresh mushrooms
- 1 (10 3/4-ounce) can condensed cream of chicken soup
- 1/2 cup milk
- 1/4 teaspoon dried tarragon
- 1 cup (4 ounces) shredded sharp Cheddar cheese
- 2 1/2 cups chopped cooked chicken
- 1/2 (16-ounce) package frozen peas and carrots, thawed
- 1/4 teaspoon salt
- 1/2 teaspoon pepper
- Melt butter in a large skillet over medium-high heat; add 1/2 cup onion, 1/2 cup celery, bell pepper and 1/2 cup sliced mushrooms, and sauté 2 to 3 minutes or until tender.Whisk in cream of chicken soup, 1/2 cup milk, and 1/4 teaspoon dried tarragon; cook over medium-low heat 3 to 4 minutes, stirring occasionally. Add 1 cup Cheddar cheese, stirring constantly, until cheese melts. Stir in cooked chicken, peas and carrots, diced pimiento, salt, and pepper. Cook over low heat, stirring often, 10 minutes or until thoroughly heated.
Spoon warm chicken mixture evenly into Biscuit Bowls.
Chicken Pot Pie in Biscuit Bowls: Substitute 1 (10-ounce) thawed package frozen mixed vegetables for peas and carrots. Add 1/2 teaspoon dried thyme and 1/2 teaspoon poultry seasoning. Omit tarragon, sliced mushrooms, and pimiento. Proceed with recipe as directed.
Biscuit Bowls
- 1 (16.3-ounce) can refrigerated jumbo flaky biscuits
- Vegetable cooking spray
Roll each biscuit to a 5-inch circle.
Invert 8 (6-ounce) custard cups or ramekins, several inches apart, on a lightly greased baking sheet. Coat outside of cups with cooking spray. Mold flattened biscuits around outside of custard cups, and bake at 350° for 14 minutes. Cool slightly, and remove biscuit bowls from cups.
If you don't have custard cups, you can use your muffin tins, no problem. Just be sure to use plenty of spray so they won't stick.
Monday, November 2, 2009
Brown Butter Cookies

If you are in the mood for a cookie that is not too sweet, but just sweet enough then you have found it. Some of my favorite cookies are the ones that are not too sweet, but sweet enough. Snickerdoodle, sugar, tea cakes, all among my favorites. I even like to make my chocolate chip cookies with semi-sweet chips because I just don't want them to be too sweet.
The cookie part of this recipe is my favorite sugar cookie dough. I have tweaked and adapted this recipe over the years to be just the texture, softness, basically all things I love about a sugar cookie. I really can't stand a sugar cookie that crumbles in your mouth making you feel like you just ate a mouthful of sand. Not my type of cookie. I tend to under bake my sugar cookies because I like them soft and chewy with a crisp edge and find that knocking of a minute or two usually helps me achieve this. You have to know your oven though, for me it's a minute off the maximum recommended bake time.
If you want to use this dough as a roll and cut dough, I think it would work out great. One trick I learned from reading recipes is to roll your cut-out dough on the cookie sheet, then cut the cookies out and lift the scrap dough off the pan. Is that not a brilliant idea? It works great! I always use parchment paper because nothing makes me more angry than something that sticks. I want to enjoy my baking and cooking as it relieves stress, sticking stuff makes me crazy!
The browned butter used in making the frosting/glaze is really the star of this show. If you have never tried a browned butter glaze/frosting you are certainly missing out and must try it immediately. It goes without saying that you have to use real butter here, no substitutes. Browning butter is really very easy. It is certainly something that you approach as you would watching a toddler-constant attention. You can't leave the stove to do something else or the results could be disastrous. Burned butter is a far cry from the heavenly flavor of browned butter. As you play with the browning process you will find that you may prefer a darker color to your butter or lighter just depending on your taste preference. As the butter melts and begins to cook it gets very foamy, stirring it calms the foaming down just long enough for it to get worked up again. As it begins to foam back up you will see how the butter is browning. I usually go with a taupe brown--light brown.
Brown butter has a nutty, toasty flavor much like caramel or toasted pecans. Depending on how much milk you add will determine whether or not this is a glaze or a frosting. I use this browned butter recipe for icing oatmeal cookies (Lord, lord talk about upgrading an oatmeal cookie!) sugar cookies, which will be called brown butter cookies from here on out, tea cakes, and even yellow cake, and pound cake. It's just delicious.
Butter Cookie dough:
1 cup Butter Flavored Crisco
1 cup sugar
1 large egg
2 T. Milk
1 T. Vanilla Extract
1/8 t. Almond Extract (I have always used a cap full and called it good)
3 cups Flour
2 t. baking powder
1/2 t. kosher salt
Preheat oven to 375. Line two cookie sheets with parchment and set aside.
In the bowl of a stand mixer, add crisco and sugar. Mix with paddle attachment on medium speed for five minutes, or until light and fluffy. Add salt, baking powder, and extracts mixing to incorporate. Add egg, and milk, mixing to incorporate then slowly reduce speed and add flour slowly until combined and pulls away.
Drop by rounded tablespoons onto parchment lined sheet and bake 7-9 minutes. Remove to cooling rack. Ice when cool.
Notes:
- I use a spring loaded scoop for my cookies because I can't really trust my eye. I have a small scoop I've used for years from pampered chef. It works great.
- I baked these cookies on a half sheet baking pan (double the size of a jelly roll pan) that I picked up at Sam's Club (two for under 10 dollars). I could get 24 cookies on this pan which really cut down on the tedious dollup and bake time.
- Using two pans meant that I would have a cool pan ready for me while the others baked.
Brown Butter Icing
4 Tablespoons butter
2 cups Confectioners sugar
3 Tablespoons milk
1 Tablespoon Vanilla extract
1/8 teaspoon Almond Extract
In a small saucepan melt the butter over medium heat. Swirl pan or stir until the butter reaches the desired color. 3-5 minutes. Remove from heat, set aside. In a medium size bowl add extracts, then pour hot butter into the bowl. Add half of the confectioners sugar, stir with a whisk or beat on low speed with a hand held mixer. It will clump together, but don't give up just keep mixing and begin to slowly add half of the milk, it will smooth out just fine. Add the remaining confectioners sugar and beat to incorporate. Determine at this point how thick or thin you would like it and add milk accordingly.
Tuesday, October 27, 2009
Flourless Chocolate Cake

One of my friends, Jamie, is about leave our office staff to stay at home with her sweet baby, Brylee, who is due in just a matter of weeks. She, her husband Mark, and their daughter Cailynn have been praying for this day to come for quite some time. Along the way she was diagnosed with gestational diabetes. Jamie is our resident chocoholic and loves anything chocolate, sweet, dessert, I think just plain food in general. It's fun to cook for someone who loves food! The staff wanted to have a shower for her as well as a "going away" party and as with any shower...you have to have cake. I really struggled with serving a cake at Jamie's shower which she couldn't eat--how fun would that be? Not.
After researching several websites and studying up on flourless cakes I came up with this version I share with you today. The carb count is very low, with the carbs coming from the chocolate chips (my best guess is around 8g per serving), but the chocolate flavor is dense, rich, and undoubtedly chocolate. I think the consistency of this cake was more like a brownie as far as texture and mouth feel. I found the sliver I ate to be the perfect serving as I served it with whipped cream (2 tablespoons has less than 1g of carbs) and strawberries.
If you are on a diet and not wanting to pull your sweet tooth out, this cake might just save the day. It will also keep the guilt fairy at bay as you serve your Baby shower honoree with gestational diabetes this cake.
Flourless Chocolate Cake:
4 oz fine quality bittersweet chocolate ( I used 60% dark chocolate Ghiradelli)
1/2 cup butter
3/4 cup sugar ( I used Splenda for baking)
3 large eggs
1/2 cup unsweetened cocoa powder
Grease an 8 inch pie or cake pan with coated spray, set aside. Preheat oven to 375 degrees. In a double boiler, melt the chocolate chips and butter until smooth. Add sugar and whisk until incorporated, sift in the cocoa powder, stir to combine. Pour into prepared pan and bake for 25 minutes or until a crust forms on the top. Remove to a cooling rack. Dust with additional cocoa power to serve.
Subscribe to:
Posts (Atom)